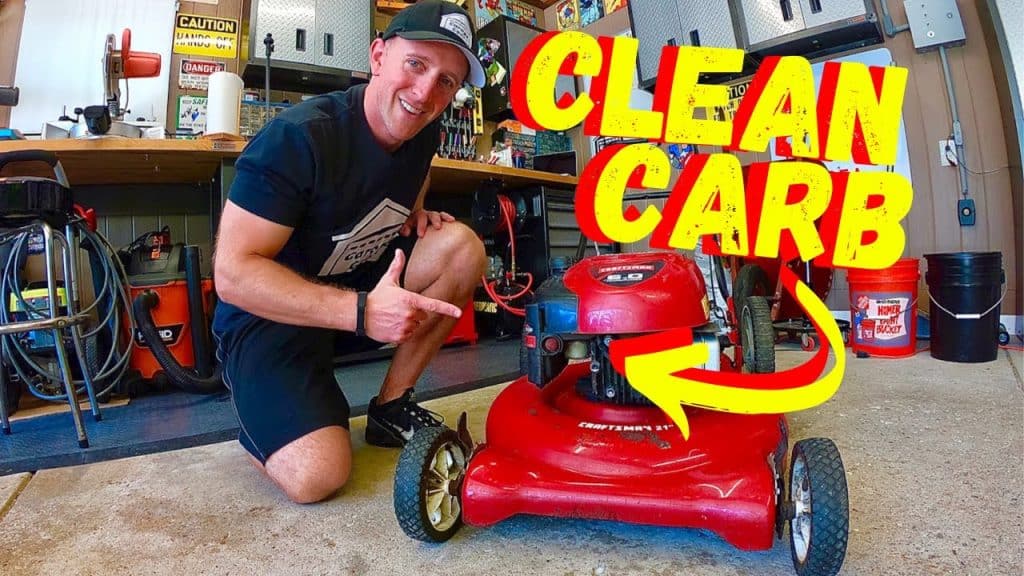
Cleaning a carburetor on a lawn mower can seem tricky. But it’s a task you can handle with the right steps.
A clean carburetor ensures your lawn mower runs smoothly and efficiently. Over time, dirt and debris can clog the carburetor, affecting performance. This can lead to problems starting the mower or keeping it running. Regular maintenance is key to avoiding these issues.
In this guide, we’ll walk you through the process of cleaning a carburetor on your lawn mower. You’ll learn simple steps to keep your mower in top shape. Whether you’re a beginner or have some experience, this guide will be easy to follow. Let’s dive in and get your lawn mower running like new again!
Tools And Materials
Cleaning a carburetor on a lawn mower might seem daunting. But with the right tools and materials, it becomes a manageable task. This section will guide you through the essential tools and required cleaning materials needed for this job.
Essential Tools
You’ll need basic tools for this task. A screwdriver set is crucial. It helps in removing and reassembling parts. Pliers are useful for gripping and pulling. A socket wrench set aids in loosening and tightening bolts. Needle-nose pliers help in reaching tight spots.
Don’t forget safety gear. Gloves protect your hands from chemicals. Safety glasses shield your eyes from debris. A small bowl or container is handy. It keeps screws and small parts organized.
Required Cleaning Materials
A good carburetor cleaner is necessary. It dissolves dirt and grime effectively. Get a can of compressed air. It blows away loose debris from the carburetor. Old toothbrushes are useful. They scrub off stubborn deposits easily.
Have some clean rags or paper towels. They wipe off excess cleaner and dirt. A small brush with stiff bristles can be handy. It helps in cleaning hard-to-reach areas. Make sure to have fresh fuel on hand. You might need it after cleaning the carburetor.
Preparation Steps
Cleaning a carburetor on a lawn mower requires some preparation. These steps ensure you are ready and safe. In this section, we will cover important safety measures and how to locate the carburetor.
Safety Measures
- Disconnect the spark plug: This prevents accidental starts. Pull the wire off the plug.
- Wear gloves: Protect your hands from dirt and chemicals.
- Work in a well-ventilated area: Ensure good airflow to avoid inhaling fumes.
- Have a fire extinguisher nearby: Safety first. Be prepared for any fire hazards.
Locating The Carburetor
To clean the carburetor, you first need to locate it. This step is crucial for a smooth process.
- Remove the air filter cover: The carburetor is usually behind the air filter.
- Identify the carburetor: Look for a metal part with a bowl at the bottom.
- Check the manual: Consult the lawn mower manual for specific details.
By following these preparation steps, you ensure a safe and effective cleaning process. Safety measures and proper identification are key. With these steps, you are ready to tackle the task.
Removing The Carburetor
To keep your lawn mower in top shape, cleaning the carburetor is essential. The first step is to remove the carburetor. This might sound complex, but with a few simple steps, you can do it yourself.
Disconnecting Fuel Lines
Start by locating the fuel lines connected to the carburetor. These lines transport fuel from the tank to the carburetor. Make sure to turn off the fuel valve first.
Next, use a pair of pliers to gently loosen the clamps holding the fuel lines. Carefully slide the clamps back, away from the carburetor. Once the clamps are moved, pull the fuel lines off the carburetor. Be prepared for a small amount of fuel to spill.
Detaching The Carburetor
With the fuel lines disconnected, you can now detach the carburetor. Begin by removing the screws or bolts that hold the carburetor in place. Use a suitable screwdriver or wrench for this task.
After removing the screws or bolts, gently pull the carburetor away from the engine. You may need to wiggle it slightly to free it. Be sure to keep track of any gaskets or seals that come off with the carburetor.
Once the carburetor is free, you are ready to clean it. Keep all parts in a safe place to ensure easy reassembly.
Cleaning The Carburetor
Cleaning the carburetor on your lawn mower is essential for its performance. Dirt and debris can clog it, making your mower run poorly. Regular cleaning keeps your mower in top shape. Here’s a step-by-step guide to help you clean your carburetor.
Disassembling Components
First, gather your tools. You’ll need screwdrivers, pliers, a wrench, and a carburetor cleaner. Make sure the mower is off and cool.
- Remove the air filter cover and air filter.
- Unscrew the bolts holding the carburetor in place.
- Gently disconnect the fuel line and any linkages attached to the carburetor. Be careful not to damage them.
- Take the carburetor out and place it on a clean surface.
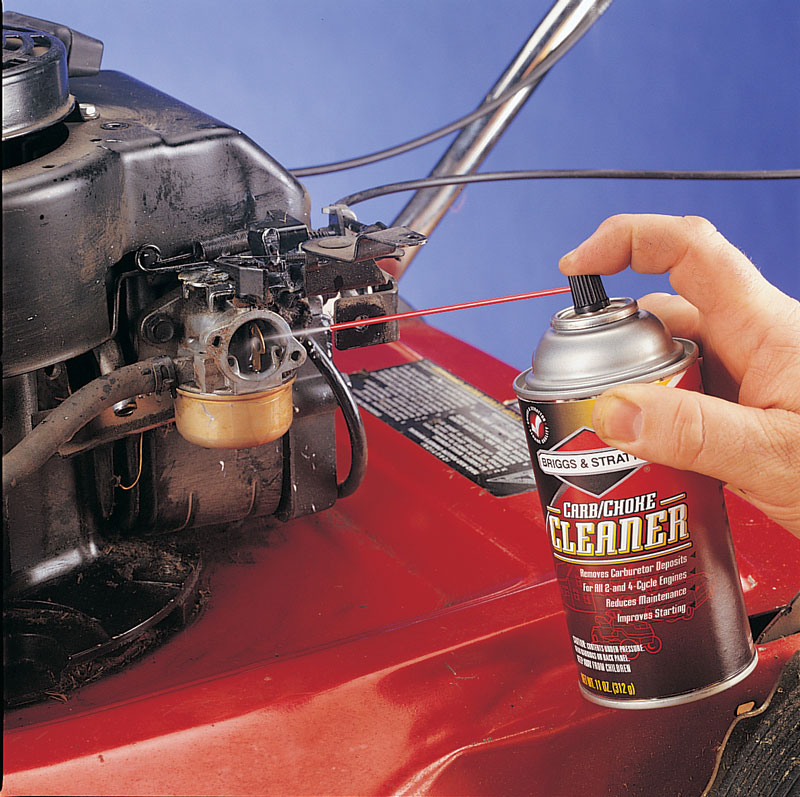
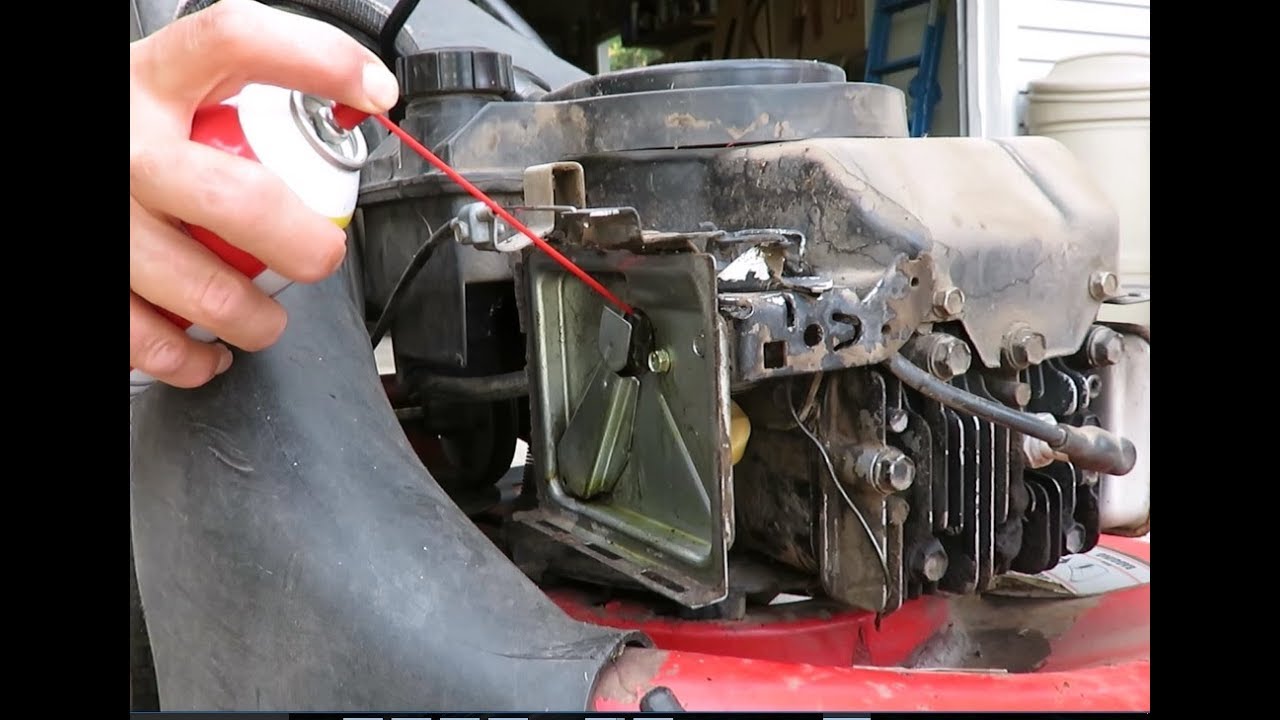
Using Carburetor Cleaner
Now, it’s time to clean the carburetor. Use a carburetor cleaner spray to remove dirt and debris. Follow these steps:
- Spray the cleaner into all openings and passages of the carburetor.
- Let the cleaner sit for a few minutes to dissolve the grime.
- Use a soft brush to scrub any remaining dirt.
- Rinse the carburetor with the cleaner again to ensure it’s spotless.
- Dry the carburetor with a clean cloth.
Inspect the carburetor for any damage. If you find any, consider replacing it.
Once clean and dry, reassemble the components in the reverse order. Make sure all connections are secure.
Regular cleaning of your carburetor ensures your lawn mower runs smoothly. Follow this guide to keep your mower in excellent condition.
Reassembling The Carburetor
After cleaning your lawn mower carburetor, the next step is reassembling it. This is a crucial part of the process. Each component must be placed correctly for the carburetor to function. Let’s go through the steps.
Inspecting Parts
Before reassembling, inspect all parts for damage. Look for cracks, wear, or any deformities. Replace any damaged parts. This ensures that your carburetor works efficiently.
| Part | Condition |
|---|---|
| Gaskets | No tears or wear |
| Float | Not cracked or damaged |
| Needle | Sharp tip, no bends |
Use a flashlight for detailed inspection. Clean parts again if needed. Ensure everything is dry before proceeding.
Reattaching Components
Start by reattaching the float and needle. Align the needle with its seat. Secure the float with its pin.
- Attach the gaskets. Ensure they are aligned properly.
- Place the main body of the carburetor back together.
- Reconnect any springs or linkages. These are usually small and easy to misplace.
- Finally, attach the carburetor to the engine. Secure it with screws or bolts.
Check all connections to ensure they are tight. Loose connections can cause leaks or poor performance.
Once everything is reassembled, your carburetor should be ready to go. Proper reassembly ensures optimal lawn mower performance.
Reinstalling The Carburetor
Once you have cleaned the carburetor, it’s time to put it back in your lawn mower. Follow these steps carefully to ensure everything is reconnected and secured properly. This will help your lawn mower run smoothly again.
Reconnecting Fuel Lines
Start by reconnecting the fuel lines to the carburetor. It’s crucial to connect the correct fuel lines to their respective ports.
- Identify the fuel inlet and outlet ports on the carburetor.
- Connect the fuel inlet line to the inlet port.
- Secure the fuel outlet line to the outlet port.
Make sure the fuel lines are firmly attached. Loose connections can lead to fuel leaks or poor performance.
Securing The Carburetor
Once the fuel lines are reconnected, secure the carburetor to the engine.
- Align the carburetor with the mounting bolts.
- Slide the carburetor onto the bolts.
- Tighten the bolts using a wrench or screwdriver.
Ensure the carburetor is tightly secured. This prevents any air leaks, which can cause engine issues.
After securing the carburetor, reattach any other components you removed, such as the air filter and throttle linkages. Double-check all connections and bolts to ensure everything is in place.
Your carburetor is now reinstalled. Start your lawn mower to test if it runs smoothly. Proper installation is key to optimal performance.
Testing And Maintenance
Testing and maintenance of a lawn mower’s carburetor ensures smooth operation. Regular checks help catch problems early. This section covers how to start the mower and tips for keeping it in top shape.
Starting The Lawn Mower
After cleaning the carburetor, it’s important to test your lawn mower. First, fill the tank with fresh fuel. Old fuel can cause problems. Next, check the oil level. Low oil can damage the engine. Pull the starter rope gently until you feel resistance. Then, pull quickly to start the engine. Listen for any unusual sounds. If the engine runs smoothly, the carburetor is clean.
Regular Maintenance Tips
Regular maintenance keeps your lawn mower running well. Check and replace the air filter every few months. A clean filter ensures proper airflow. Use a fuel stabilizer to prevent fuel from going bad. Change the oil every 25-50 hours of use. Clean the spark plug and check for wear. Replace it if necessary. Store your mower in a dry, covered area to protect it from the elements. By following these tips, you can extend the life of your lawn mower and keep it running efficiently.

Frequently Asked Questions
How Do I Know If My Carburetor Needs Cleaning?
If your lawn mower stalls, runs rough, or won’t start, the carburetor might need cleaning. Dirty carburetors often cause these issues.
What Tools Do I Need To Clean A Carburetor?
Basic tools include screwdrivers, wrenches, carburetor cleaner, and a small brush. These tools will help you disassemble and clean the carburetor properly.
Can I Clean A Carburetor Without Removing It?
Yes, you can clean some parts without removing it. However, a thorough cleaning usually requires removal for better access.
How Often Should I Clean My Lawn Mower Carburetor?
Clean the carburetor at least once a season. Regular maintenance prevents clogs and ensures your mower runs smoothly.
Conclusion
Cleaning a lawn mower carburetor is crucial for its performance. Regular maintenance ensures smooth operation. Follow the steps carefully to avoid issues. Always use the proper tools and safety gear. A clean carburetor improves fuel efficiency. It also extends the life of your mower.
Practice these tips to keep your lawn mower in top shape. Regular checks and cleanings save you time and money. Keep your lawn looking great with a well-maintained mower. Happy mowing!
