Cleaning the carburetor on a lawn mower is essential for smooth operation. A well-maintained carburetor ensures your mower runs efficiently.
Over time, dirt and debris can clog the carburetor. This can cause your lawn mower to perform poorly or not start at all. Cleaning the carburetor might seem daunting, but it’s a straightforward process. Anyone can do it with a little guidance.
In this blog post, we’ll walk you through the steps to clean your lawn mower’s carburetor. You’ll learn what tools you need and how to safely complete the task. By the end, your lawn mower will run like new again. Let’s dive in and get your lawn mower back in top shape!
Tools And Materials
Cleaning your lawn mower’s carburetor can seem daunting. But with the right tools and materials, the process becomes manageable. Below, we break down the essential items you need.
Required Tools
First, gather the necessary tools. A screwdriver is crucial. It helps you remove screws and bolts. A wrench set is also essential. Different sizes ensure you can handle various bolts. Pliers come in handy for gripping and pulling parts. A small brush is useful for scrubbing. A flashlight helps you see small parts and dark spots.
Necessary Cleaning Materials
Next, collect the cleaning materials. A carburetor cleaner is vital. It dissolves built-up grime and dirt. Clean rags or paper towels are necessary for wiping. They help remove loosened debris. A container of clean water is useful. It rinses off parts after cleaning. Don’t forget a pair of gloves. They protect your hands from chemicals and sharp edges.
Preparation
Preparing to clean a lawn mower carburetor requires some basic tools and a clean workspace. Gather a screwdriver, carburetor cleaner, and a small brush to get started.
Cleaning the carburetor on a lawn mower begins with thorough preparation. A well-prepared workspace makes the task simpler and safer. Follow these steps to ensure you’re ready.Safety Measures
Safety is crucial. Start by disconnecting the spark plug to avoid accidental starts. Wear gloves to protect your hands from fuel and grime. Use safety goggles to shield your eyes from debris. Keep a fire extinguisher nearby. Fuel and carb cleaner are flammable. Work in a well-ventilated area to avoid inhaling fumes.Positioning The Lawn Mower
Proper positioning of the lawn mower is vital. Find a flat, stable surface to prevent tipping. Raise the mower deck to access the carburetor easily. Use a block or jack stand for extra stability. This position allows you to work comfortably and safely. Tilt the mower slightly if needed, but ensure it remains stable. “`Accessing The Carburetor
Cleaning your lawn mower’s carburetor starts with accessing it. This can seem tricky. But with a few simple steps, you’ll get it done quickly. Follow these steps carefully to avoid any damage.
Removing The Air Filter
First, remove the air filter. This is usually easy. Locate the air filter cover. It’s often on the side of the mower engine. Use a screwdriver to remove the screws holding the cover.
Take off the cover. Now, you see the air filter. Gently pull out the air filter. Be careful not to damage it.
Locating The Carburetor
Now, you need to find the carburetor. It’s right behind the air filter. The carburetor is a small, metal part. It looks like a box with tubes.
Check for fuel lines connected to it. These help you identify the carburetor. Once you find it, you are ready for the next steps.

Disassembling The Carburetor
Disassembling the carburetor on a lawn mower can seem daunting. But with the right steps, it’s manageable. This section will guide you through the process. Follow these steps to disassemble the carburetor and clean it effectively.
Removing Carburetor Parts
Start by turning off the lawn mower. Disconnect the spark plug to avoid accidental starts. Next, locate the carburetor. It is usually near the air filter. Remove the air filter and set it aside. You will now see the carburetor.
Loosen the screws holding the carburetor in place. Gently pull the carburetor away from the engine. Be careful not to damage any parts. Remove any linkages or fuel lines connected to the carburetor. Take note of their positions for reassembly.
Inspecting For Damage
With the carburetor parts removed, inspect each piece. Look for cracks, wear, or damage. Pay special attention to the gaskets and seals. Damaged parts can affect the performance of your lawn mower.
Check the float and needle valve. They should move freely without sticking. Examine the jets and passageways for clogs or debris. Use a magnifying glass if needed. Clean or replace any damaged parts before reassembling.
Cleaning Process
Keeping your lawn mower running smoothly involves regular maintenance. One crucial task is cleaning the carburetor. This ensures efficient fuel consumption and optimal performance. Let’s dive into the cleaning process step by step.
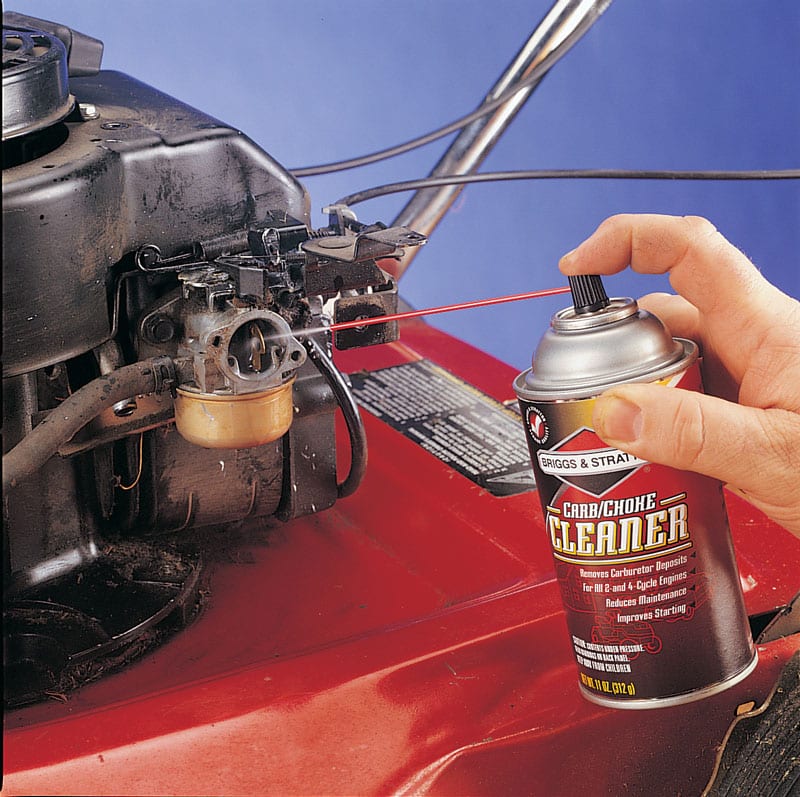
Using Carburetor Cleaner
Before starting, gather your tools. You will need a carburetor cleaner spray, a screwdriver, and a clean cloth.
- Turn off the lawn mower and disconnect the spark plug.
- Locate the carburetor. It’s usually near the air filter.
- Remove the air filter cover to access the carburetor.
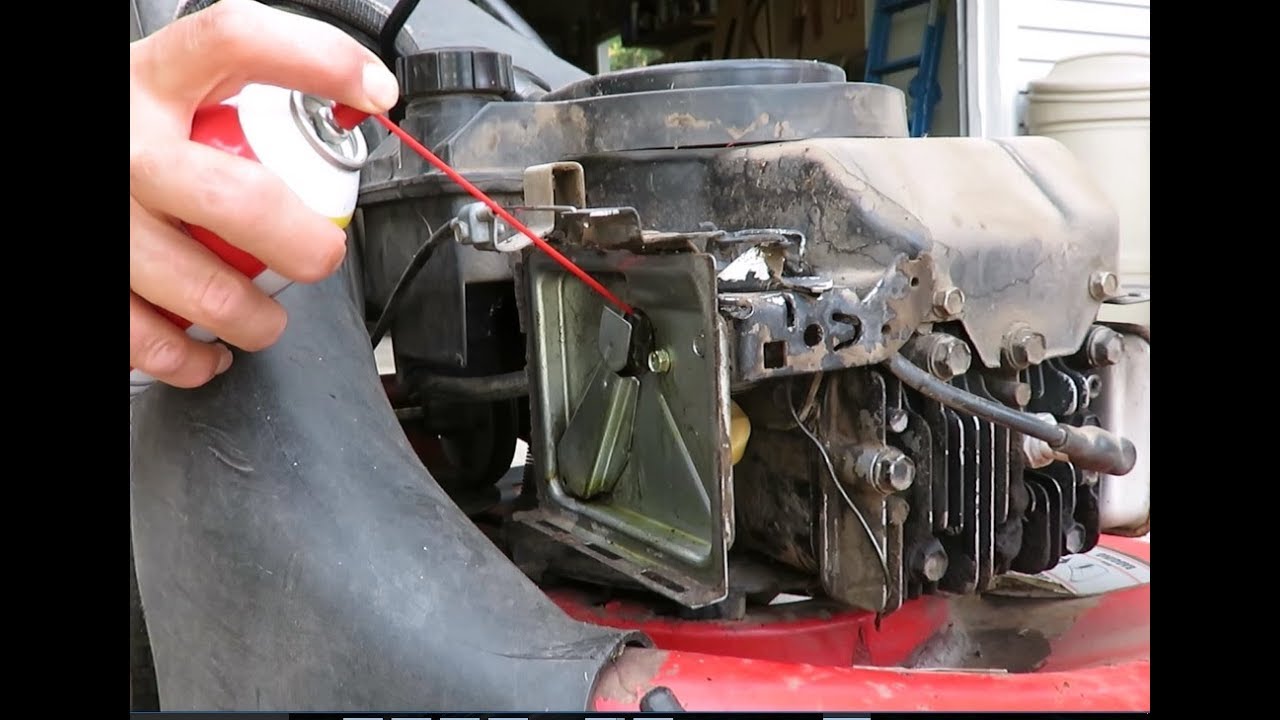
- Spray the carburetor cleaner generously on the outside of the carburetor.
- Use a clean cloth to wipe away the loosened dirt and grime.
Cleaning Small Parts
The carburetor has small parts that need attention. Focus on the needle valve and float bowl.
- Carefully remove the float bowl using a screwdriver.
- Inspect the float bowl for any debris or residue.
- Spray carburetor cleaner inside the float bowl.
- Use a small brush to scrub off any stubborn dirt.
- Rinse with cleaner and dry thoroughly.
Next, clean the needle valve:
- Detach the needle valve from the carburetor.
- Spray carburetor cleaner on the valve.
- Use a soft brush to clean it carefully.
- Ensure it’s completely dry before reassembling.
Reattach all parts, reconnect the spark plug, and start the lawn mower to test. A clean carburetor ensures smooth operation.
Reassembling The Carburetor
Once you have cleaned all the carburetor parts, it’s time to reassemble them. This step is crucial for ensuring your lawn mower runs smoothly. Follow these steps to put everything back together correctly.
Reassembling Parts
Begin by carefully placing the float and needle valve back into their positions. Ensure the float moves freely. Next, attach the main jet and idle jet. Tighten them securely but avoid over-tightening.
Reinstall the gaskets and diaphragms in the correct order. These parts are delicate, so handle them with care. Refer to your manual if unsure about the correct placement.
| Part | Action |
|---|---|
| Float | Place and check movement |
| Needle Valve | Insert carefully |
| Main Jet | Tighten securely |
| Idle Jet | Tighten securely |
| Gaskets | Install in correct order |
| Diaphragms | Handle with care |
Ensuring Proper Fit
Double-check that all parts fit properly. Misaligned parts can cause leaks or poor performance. Make sure the choke and throttle plates move smoothly without sticking.
Secure the carburetor back onto the engine. Use the proper screws and tighten them evenly. This ensures a good seal and prevents air leaks.
- Check for smooth movement of choke and throttle plates.
- Ensure no parts are left loose.
- Tighten screws evenly for a good seal.
Reconnect the fuel line and air filter. Make sure the fuel line is secure to prevent leaks. Finally, reattach any linkage or springs that were removed during disassembly.
- Reconnect the fuel line securely.
- Reattach the air filter.
- Reinstall linkage and springs.
By following these steps, you ensure your carburetor is reassembled correctly. This helps your lawn mower run efficiently and smoothly.
Reinstallation
Reinstalling the carburetor is the final step after cleaning. This ensures your lawn mower runs smoothly. Follow these steps to attach the carburetor and reconnect the air filter.
Attaching The Carburetor
First, place the carburetor back in its position. Ensure it aligns with the mounting bolts. Use your wrench to tighten the bolts securely. This prevents any air leaks.
Next, reconnect the fuel line to the carburetor. Use pliers to clamp it tightly. Make sure there are no fuel leaks. Then, attach the throttle linkage and choke linkage. Ensure they are connected properly to maintain control.
Reconnecting The Air Filter
After the carburetor is secure, reinstall the air filter. Begin by attaching the air filter base to the carburetor. Tighten the screws to hold it in place.
Then, place the air filter element inside the base. Ensure it fits snugly. Finally, secure the air filter cover. Tighten its screws to prevent any dirt from entering.
Your lawn mower’s carburetor is now reinstalled. It is ready for use.
Testing And Maintenance
Keeping your lawn mower’s carburetor clean ensures it runs smoothly. Regular maintenance is key. Testing the lawn mower after cleaning is essential. This confirms the carburetor works properly. Follow these steps to maintain and test your lawn mower.
Starting The Lawn Mower
After cleaning the carburetor, you need to start the lawn mower. First, check the fuel level. Ensure there is enough fuel in the tank. Then, press the primer bulb three times. This helps to circulate the fuel.
Next, set the throttle to the “fast” position. Pull the starter rope gently until you feel resistance. Then, pull it quickly to start the engine. If the engine does not start, repeat the process.
Regular Maintenance Tips
- Check the air filter regularly. Replace it if dirty.
- Inspect the spark plug. Clean or replace it as needed.
- Examine the fuel lines. Ensure there are no cracks or leaks.
- Clean the carburetor every few months. This prevents buildup.
- Use fresh fuel. Old fuel can cause issues.
Following these tips ensures your lawn mower runs efficiently. Regular checks prevent problems. This saves you time and money in the long run.

Frequently Asked Questions
How Often Should You Clean A Lawn Mower Carburetor?
You should clean the carburetor at least once per season. If you use your mower frequently, clean it more often to ensure optimal performance.
What Tools Are Needed To Clean A Carburetor?
You will need a screwdriver, wrench, carburetor cleaner, and a small brush. Having these tools handy will make the process smoother.
Can A Dirty Carburetor Affect Lawn Mower Performance?
Yes, a dirty carburetor can cause engine problems. It can lead to poor performance, difficulty starting, and stalling during use.
How Do You Identify A Dirty Carburetor?
Common signs include difficulty starting the mower, poor engine performance, and black smoke from the exhaust. These indicate it’s time to clean the carburetor.
Conclusion
Cleaning your lawn mower’s carburetor is essential for proper maintenance. A clean carburetor ensures smooth operation. Regular cleaning can prevent many issues. Follow the steps carefully. Use the right tools and materials. Safety first, always wear gloves. Doing this yourself saves money.
Your lawn mower will run better. A well-maintained mower lasts longer. Keep your lawn looking great. Happy mowing!
