
Cleaning a carburetor on a lawn mower is essential for smooth operation. A clean carburetor ensures efficient fuel use and prevents engine problems.
Keeping your lawn mower in top shape involves regular maintenance. One key component to focus on is the carburetor. Over time, dirt and debris can clog the carburetor, affecting the mower’s performance. Learning how to clean it can save you time and money.
It may seem complicated, but with some simple steps, you can do it yourself. In this guide, we’ll break down the process, making it easy for anyone to follow. Whether you’re a seasoned gardener or a beginner, understanding how to clean your mower’s carburetor is crucial for a healthy lawn.
Tools And Materials
Cleaning your lawn mower’s carburetor keeps it running smoothly. You need the right tools and materials to do the job correctly. Here’s what you need to get started.
Essential Tools
You will need a few basic tools. A socket set helps you remove bolts. A screwdriver helps you take apart the carburetor. A pair of needle-nose pliers helps you handle small parts. Have a clean rag for wiping down parts. Use safety goggles to protect your eyes.
Recommended Cleaning Products
Choose a good carburetor cleaner. It dissolves dirt and grime. A can of compressed air helps blow out debris. A small brush helps scrub away stubborn deposits. A container of fresh fuel helps rinse the carburetor. A pair of disposable gloves keeps your hands clean.
Preparation
Proper preparation is crucial before cleaning your lawn mower’s carburetor. This step ensures safety and efficiency. Let’s dive into the two key elements of preparation: Safety Precautions and Workspace Setup.
Safety Precautions
Before starting, ensure your safety. Here are some essential safety tips:
- Disconnect the spark plug: This prevents the engine from starting accidentally.
- Wear safety gear: Use gloves and safety glasses to protect your hands and eyes.
- Work in a well-ventilated area: This avoids inhaling harmful fumes.
Workspace Setup
Setting up your workspace is the next step. A clean, organized area helps you work efficiently.
- Choose a flat surface: This keeps the mower stable.
- Lay down a tarp: It catches any small parts that might fall.
- Gather your tools: Have wrenches, screwdrivers, and a carburetor cleaner ready.
With these preparations, you are ready to start cleaning your lawn mower’s carburetor. A safe and organized workspace makes the process smoother and more efficient.
Removing The Carburetor
Cleaning the carburetor of your lawn mower is essential for its smooth operation. Removing the carburetor is the first step. This process involves several steps to ensure you can clean it properly and reinstall it without issues. Follow the guide below to safely remove the carburetor from your lawn mower.
Disconnecting The Spark Plug
Before starting, always disconnect the spark plug. This ensures safety and prevents accidental starts.
- Locate the spark plug wire on the front of the engine.
- Firmly pull the rubber boot off the spark plug.
- Use a spark plug wrench to remove the spark plug if needed.
Detaching Fuel Lines
Next, detach the fuel lines connected to the carburetor. This helps to prevent fuel spills and makes it easier to remove the carburetor.
- Locate the fuel lines that connect the fuel tank to the carburetor.
- Use pliers to release the clamps holding the fuel lines.
- Slide the fuel lines off the carburetor carefully.
- Drain any remaining fuel into a container to avoid spills.
With the spark plug disconnected and the fuel lines detached, the carburetor is ready to be removed. Follow these steps to ensure a clean, safe, and efficient process. Properly removing the carburetor makes the cleaning process easier and more effective.
Disassembling The Carburetor
Cleaning the carburetor of your lawn mower is crucial for its performance. The first step is disassembling the carburetor. This process allows you to clean and inspect each component thoroughly. Understanding how to take apart the carburetor ensures that you can reassemble it correctly. Let’s dive into the details.
Removing The Bowl
The bowl is the bottom part of the carburetor. It holds fuel and can collect debris. Follow these steps to remove it:
- Turn off the lawn mower and disconnect the spark plug.
- Locate the carburetor and find the bowl at the bottom.
- Use a wrench to remove the nut holding the bowl in place.
- Carefully detach the bowl, avoiding any fuel spillage.
Inspecting Components
Once the bowl is removed, inspect the carburetor components. This helps identify any parts that need cleaning or replacement:
- Check the bowl for dirt, debris, or corrosion.
- Look at the float and needle valve for wear or damage.
- Examine the gasket for cracks or tears.
- Inspect the jets for clogs or blockages.
Cleaning and inspecting your lawn mower’s carburetor can extend its life and improve performance. Taking the time to disassemble it properly ensures you address all potential issues.
Cleaning The Carburetor
Cleaning the carburetor is essential for your lawn mower’s performance. A dirty carburetor can cause the engine to run poorly or not start at all. By cleaning it regularly, you ensure smooth operation and extend the life of your mower. In this section, we will guide you through the steps to clean your carburetor effectively.
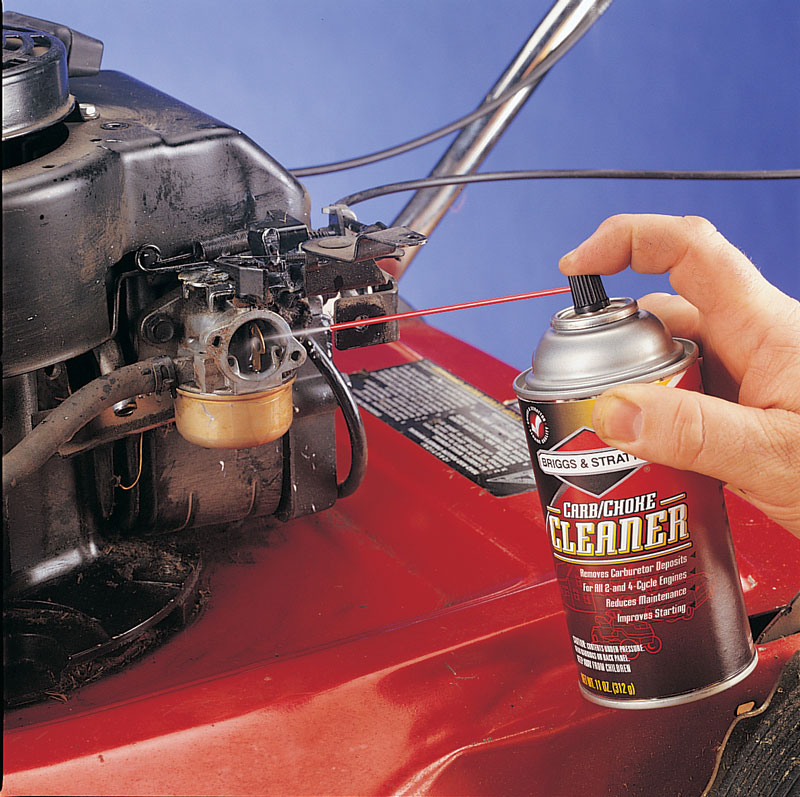
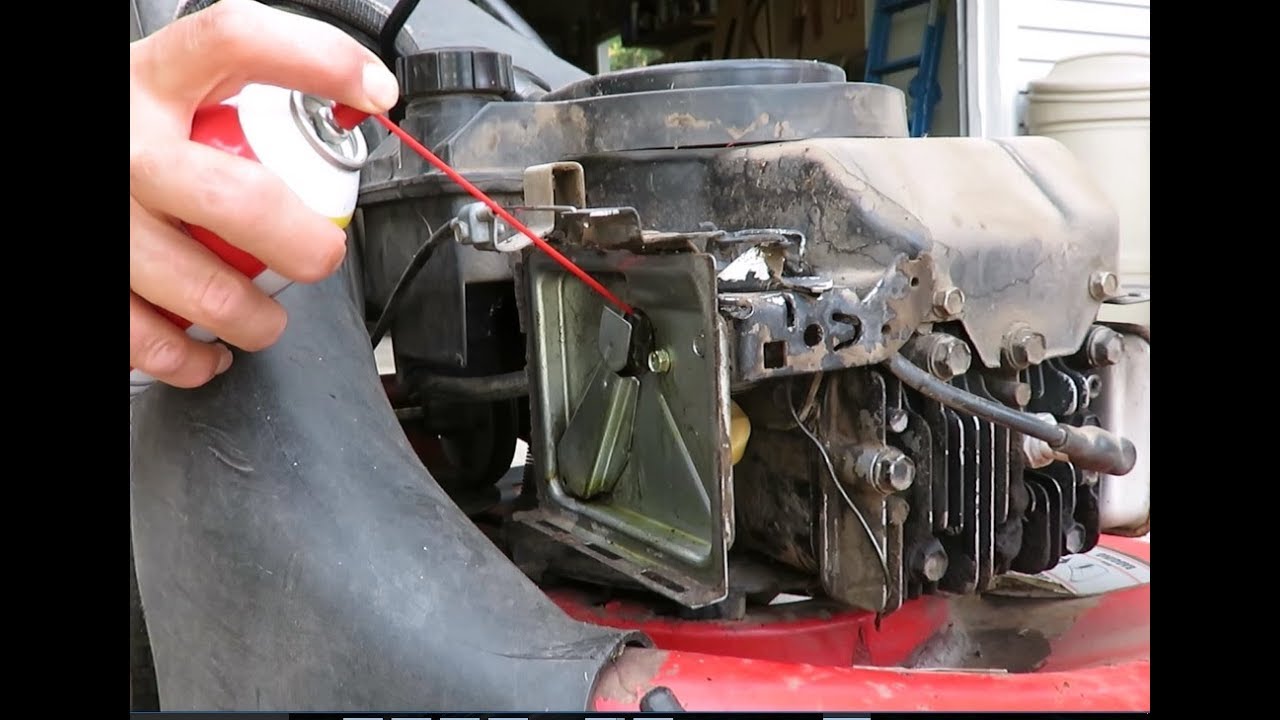
Using Carburetor Cleaner
First, gather all necessary tools and materials. You will need a carburetor cleaner, a brush, and a clean cloth. Start by removing the air filter cover and the air filter. This gives you access to the carburetor. Spray the carburetor cleaner generously on all visible parts. The cleaner helps dissolve dirt and grime. Use a brush to scrub away any stubborn deposits. Wipe the area with a clean cloth to remove any residue.
Cleaning Jets And Passages
Next, focus on the jets and passages. These are small openings that fuel passes through. Over time, they can get clogged with debris. Use a thin wire or needle to clear these openings. Spray carburetor cleaner into the jets and passages to ensure they are clean. Be thorough, as any blockage can affect performance. Reassemble the carburetor carefully once you finish cleaning.

Reassembling The Carburetor
Reassembling the carburetor is crucial after cleaning. It ensures your lawn mower runs smoothly. Follow these steps carefully to avoid issues.
Reattaching The Bowl
First, locate the carburetor bowl. It is usually at the bottom. Position it correctly under the carburetor body. Align the gasket properly to prevent leaks. Use your fingers to screw the bowl nut in place. Tighten it with a wrench for a secure fit. Ensure it is snug, but don’t overtighten. This can damage the threads.
Securing All Components
Next, reattach all the removed components. Start with the float and needle valve. Ensure the float moves freely. Reconnect the throttle and choke linkages. These control the engine speed and air intake. Reattach the fuel line to the carburetor. Secure it with a clamp or fitting. Check all connections for tightness. Loose parts can cause the engine to malfunction. Finally, reinstall the air filter and housing. This protects the carburetor from dirt and debris.
Reinstalling The Carburetor
After cleaning the carburetor, it’s crucial to reinstall it correctly. This step ensures your lawn mower runs smoothly. Pay attention to the details to avoid any issues.
Reconnecting Fuel Lines
Begin by reconnecting the fuel lines to the carburetor. Ensure each line fits snugly and securely. Loose connections can cause fuel leaks. Check for any cracks or wear in the fuel lines.
If the lines are damaged, replace them immediately. Properly connected fuel lines ensure a steady flow of fuel to the engine. This helps the lawn mower perform efficiently.
Reattaching The Carburetor
Next, reattach the carburetor to the engine. Align the carburetor with the mounting bolts. Tighten the bolts evenly to secure the carburetor in place.
Do not over-tighten the bolts. Over-tightening can damage the carburetor. Check the gasket for any wear or damage. Replace the gasket if necessary to prevent air leaks.
Finally, reconnect any linkage and control cables. Ensure they move freely and are not kinked. Properly reattached linkage ensures smooth operation of the lawn mower.
Testing And Maintenance
Testing and Maintenance are crucial for keeping your lawn mower’s carburetor in perfect shape. It ensures your machine runs smoothly and efficiently. Let’s dive into the steps for Running the Engine and essential Regular Maintenance Tips.
Running The Engine
After cleaning the carburetor, start the engine to test its performance. Ensure you use fresh gasoline. Observe the engine’s response as it starts.
- Check for smooth start-up.
- Listen for unusual sounds.
- Watch for smoke or sputtering.
If the engine runs smoothly, your carburetor is clean and working well. If not, you may need to clean the carburetor again or check for other issues.
Regular Maintenance Tips
Regular maintenance is key to a long-lasting lawn mower. Follow these tips to keep your carburetor in top shape.
| Task | Frequency |
|---|---|
| Clean air filter | Every 25 hours of use |
| Change engine oil | Every 50 hours of use |
| Inspect spark plug | Every season |
| Check fuel lines | Every season |
Clean the air filter every 25 hours of use. This prevents dirt from entering the carburetor. Change the engine oil every 50 hours. It keeps the engine running smoothly.
Inspect the spark plug every season. Replace it if it looks worn or dirty. Check the fuel lines for cracks or leaks. Replace them if needed to avoid fuel issues.
Following these maintenance tips ensures your lawn mower stays in excellent condition. A well-maintained carburetor means a well-functioning mower.
Frequently Asked Questions
How Often Should I Clean My Lawn Mower Carburetor?
You should clean your lawn mower carburetor at least once a season. Regular maintenance ensures optimal performance. If your mower runs rough, clean it more frequently.
What Tools Do I Need To Clean A Carburetor?
You’ll need a screwdriver, carburetor cleaner, and a brush. A socket set might be necessary for removing bolts. Always wear gloves for safety.
Can I Clean A Carburetor Without Removing It?
Yes, you can clean the carburetor without removing it. Use a carburetor cleaner spray. Spray directly into the carburetor throat to dissolve debris.
What Are Signs My Carburetor Needs Cleaning?
Signs include poor engine performance, difficulty starting, and black smoke. Unusual noises can also indicate a dirty carburetor. Regular cleaning can prevent these issues.
Conclusion
Cleaning your lawn mower’s carburetor keeps it running smoothly. Follow the steps carefully. A clean carburetor improves performance and extends the mower’s life. Regular maintenance prevents issues. Your lawn will look great with a well-maintained mower. Happy mowing!
