
Cleaning a carburetor on a riding lawn mower is essential for smooth operation. Here’s how you can do it in simple steps.
A riding lawn mower’s carburetor plays a crucial role in its performance. If your mower starts sputtering or won’t start, a dirty carburetor might be the problem. Regular maintenance can save you from headaches and costly repairs. By cleaning the carburetor, you ensure your mower runs efficiently and lasts longer.
This guide will help you understand the steps to clean the carburetor, making your lawn care routine hassle-free. Ready to get your hands a little dirty? Let’s dive into the process of cleaning your mower’s carburetor.
Preparation
Cleaning the carburetor on your riding lawn mower ensures better performance. Proper preparation is essential for a smooth cleaning process. This section will guide you through the necessary steps.
Safety Precautions
Always prioritize safety. Start by turning off the engine. Disconnect the spark plug to prevent accidental starts. Wear gloves to protect your hands. Ensure the work area is well-ventilated. Keep a fire extinguisher nearby.
Locating The Carburetor
The carburetor is usually found on the side of the engine. Check your mower’s manual for exact location details. Look for the air filter; the carburetor is often behind it. Remove any covers or obstacles to access the carburetor easily.
Removing The Carburetor
Cleaning the carburetor on your riding lawn mower can improve its performance. The first step is to remove the carburetor carefully. This section will guide you through this process.
Disconnecting Fuel Lines
To start, locate the fuel lines connected to the carburetor. These lines transfer fuel from the tank to the carburetor.
- Use pliers to remove the clamps holding the fuel lines.
- Gently pull the fuel lines away from the carburetor.
- Be prepared for some fuel to spill; have a container ready.
Ensure all fuel lines are disconnected before moving to the next step.
Detaching The Carburetor
Once the fuel lines are disconnected, you can detach the carburetor itself. This part requires careful handling.
- Locate the bolts or screws securing the carburetor to the engine.
- Use a wrench or screwdriver to remove these bolts or screws.
- Gently pull the carburetor away from the engine. Avoid damaging the gasket.
With the carburetor removed, you can now proceed to clean it thoroughly.
Disassembling The Carburetor
Disassembling the carburetor is a crucial step in cleaning your riding lawn mower. This process ensures that each part is free from dirt and debris, leading to a smoother running engine. Follow these steps to carefully disassemble the carburetor and inspect each component.
Removing The Float Bowl
The float bowl is a key part of the carburetor. Here’s how to remove it:
- First, locate the float bowl at the bottom of the carburetor.
- Use a wrench to unscrew the bolts holding the float bowl in place. Be careful not to strip the bolts.
- Gently remove the float bowl. Watch for any residual fuel that may spill out.
Ensure the gasket between the bowl and carburetor is intact. If damaged, you will need to replace it.
Inspecting And Cleaning Parts
Once the float bowl is removed, inspect the internal parts of the carburetor:
- Float: Check the float for any signs of damage or wear. The float should move freely without sticking.
- Needle valve: Ensure the needle valve is clean and free of debris. A clogged valve can disrupt fuel flow.
- Jets: Use a fine wire or carburetor cleaner to clean the jets. These are small and can easily clog.
Clean each part with a carburetor cleaner. Make sure to wear gloves and work in a well-ventilated area.
| Part | Condition | Action |
|---|---|---|
| Float | Moves freely | No action needed |
| Needle valve | Clogged | Clean thoroughly |
| Jets | Blocked | Use wire or cleaner |
After cleaning, reassemble the carburetor in the reverse order of disassembly. Ensure all parts are securely in place. A clean carburetor will improve your mower’s performance.

Cleaning The Carburetor
Cleaning the carburetor on a riding lawn mower ensures it runs smoothly. A dirty carburetor can cause various problems, including stalling and poor fuel efficiency. Regular maintenance can extend the life of your mower. This guide will help you clean the carburetor effectively.
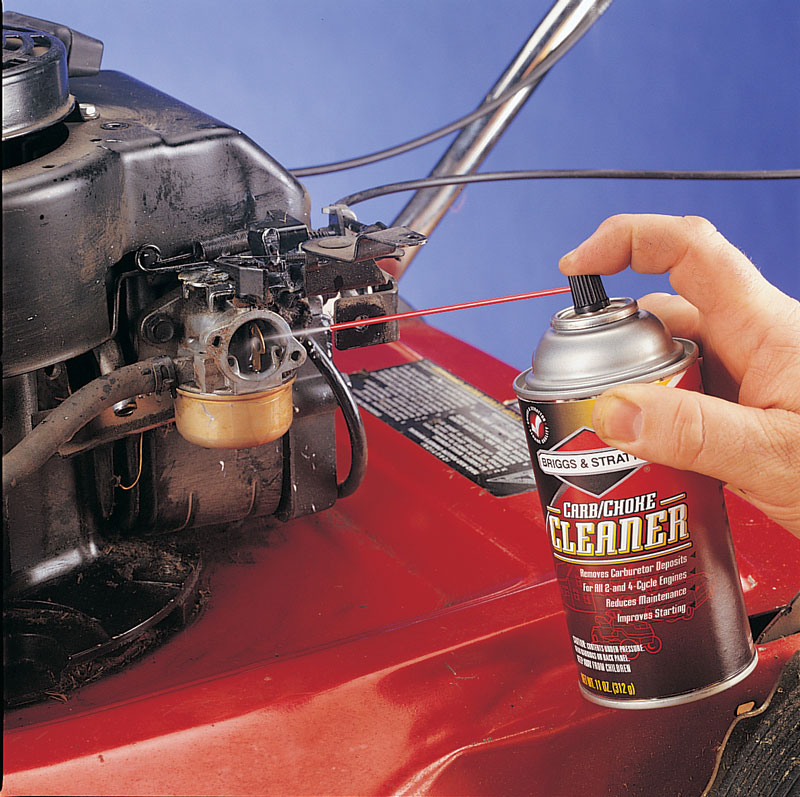
Using Carburetor Cleaner
Start by gathering your tools. You’ll need a carburetor cleaner spray, a brush, and a clean cloth. Turn off the mower and disconnect the spark plug to ensure safety. Remove the air filter to access the carburetor.
Spray the carburetor cleaner on all visible parts. Use the brush to scrub away dirt and grime. Pay attention to crevices and tight spots. Let the cleaner sit for a few minutes. Wipe everything down with the clean cloth. This will remove any remaining residue.
Clearing Clogged Jets
Clogged jets can cause the engine to run poorly. Locate the jets within the carburetor. Use a fine wire or needle to clear blockages. Be gentle to avoid damaging the jets.
Spray the jets with carburetor cleaner. This helps dissolve any remaining debris. Reassemble the carburetor and air filter. Reconnect the spark plug. Start the mower to ensure it runs smoothly.
Reassembling The Carburetor
After cleaning the carburetor, putting it back together is crucial. Follow these steps carefully to ensure your riding lawn mower runs smoothly. This section will guide you through reassembling the carburetor correctly.
Reattaching The Float Bowl
First, place the float bowl back onto the carburetor. Make sure it sits properly. The bowl should fit snugly without gaps. Secure it with the screws you removed earlier. Tighten the screws, but avoid over-tightening. Over-tightening can damage the carburetor.
Ensuring Proper Alignment
Next, check all parts for proper alignment. Misaligned parts can cause the mower to run poorly. Reconnect the linkage and throttle cables. Ensure they move freely without sticking. Verify the gasket is seated correctly. A misaligned gasket can cause air leaks.
Finally, reattach the carburetor to the engine. Secure it with the mounting bolts. Double-check all connections and screws. Ensuring everything is tight and in place is key. Your carburetor should now be ready for use.
Reinstalling The Carburetor
Once you have cleaned the carburetor, it is time to reinstall it. This step is crucial for getting your riding lawn mower back in working order. Follow these steps to ensure the carburetor is securely and correctly reinstalled.
Connecting Fuel Lines
Start by reconnecting the fuel lines to the carburetor. Ensure each line is attached to the correct port. Double-check the connections to avoid leaks.
- Attach the fuel line to the inlet port.
- Secure the fuel return line to the outlet port.
- Make sure all clamps are tight and secure.
Securing The Carburetor
Next, secure the carburetor back onto the engine. Use the bolts and nuts you removed earlier.
- Align the carburetor with the engine mount.
- Insert the bolts through the mounting holes.
- Tighten the nuts to secure the carburetor in place.
Ensure the carburetor is firmly attached. This prevents vibrations and potential damage.
Reconnect any additional components you removed. This might include the air filter or throttle linkages. Double-check all connections before starting the engine.
Testing The Lawn Mower
After cleaning your lawn mower’s carburetor, you need to test it. This ensures the engine runs smoothly and checks if the carburetor is working properly. Follow these steps to test your lawn mower effectively.
Starting The Engine
First, place the lawn mower on a flat surface. Check the fuel level and add fuel if needed. Make sure the mower is in neutral. Then, turn the ignition key to start the engine. If the engine starts, listen for any unusual noises. If the engine does not start, check the connections and try again.
Checking For Proper Operation
Once the engine starts, let it run for a few minutes. Observe if it runs smoothly without stalling. Check the throttle response by slowly increasing the throttle. The engine should respond instantly without any hesitation.
Next, engage the blades and check their operation. The blades should spin freely without any strange noises. If everything seems fine, take the mower for a short drive. Pay attention to how it runs and handles.
If the engine runs smoothly and the mower operates correctly, the carburetor cleaning was successful. If you notice any issues, you may need to recheck the carburetor or consult a professional.
Maintenance Tips
Keeping your riding lawn mower’s carburetor clean is essential. It ensures the engine runs smoothly and efficiently. Regular maintenance can prevent costly repairs and extend the life of your mower. Below are some tips to help you maintain your carburetor.
Regular Cleaning Schedule
Set a regular cleaning schedule for your carburetor. Clean it at least once every season. This helps remove dirt, debris, and fuel residues that can clog the carburetor. Follow these steps for regular cleaning:
- Turn off the engine and let it cool.
- Disconnect the spark plug to avoid accidental starts.
- Remove the air filter cover and the air filter.
- Locate the carburetor and remove it carefully.
- Use a carburetor cleaner spray to clean all parts.
- Reassemble the carburetor and air filter.
- Reconnect the spark plug and start the engine.
Signs Of Carburetor Issues
Watch for signs of carburetor issues. Identifying problems early can save time and money. Here are some common signs:
- Engine is hard to start.
- Engine stalls or runs rough.
- Black smoke from the exhaust.
- Increased fuel consumption.
- Engine surges or backfires.
If you notice any of these issues, check the carburetor immediately. Clean or repair as needed to keep your mower running smoothly.

Frequently Asked Questions
What Tools Are Needed To Clean A Carburetor?
You will need basic tools like screwdrivers, wrenches, and carburetor cleaner. Make sure to have safety gloves and goggles.
How Often Should You Clean The Carburetor?
Clean your carburetor at least once a year. Regular cleaning ensures optimal performance and extends the life of your lawn mower.
Can A Dirty Carburetor Affect Performance?
Yes, a dirty carburetor can cause poor engine performance. It can lead to difficulty starting, stalling, and reduced power.
What Are Signs Of A Dirty Carburetor?
Common signs include hard starting, rough idling, and black smoke. Your lawn mower may also have reduced fuel efficiency.
Conclusion
Cleaning a carburetor on a riding lawn mower keeps it running well. Follow the steps to ensure your mower stays in top shape. Regular maintenance prevents bigger issues. It extends the life of your equipment. Always use proper tools and safety gear.
A clean carburetor improves fuel efficiency. It also enhances performance. Taking care of your mower saves money on repairs. Enjoy a smoother and more reliable mowing experience. Happy mowing!
