Changing a lawn mower blade might seem tricky. But it’s simpler than you think.
A well-maintained lawn mower cuts grass evenly and keeps your yard looking neat. Over time, blades get dull and can tear the grass instead of cutting it cleanly. Replacing the blade is essential for a healthy lawn. In this guide, you’ll learn how to change a lawn mower blade safely and efficiently.
With just a few tools and some basic steps, you can have your mower working like new. Ready to give your lawn the care it deserves? Let’s dive in and get started!

Tools And Materials
Changing a lawn mower blade is a straightforward task. It requires some basic tools and materials. Having the right tools and materials ensures a smooth process. This section covers all you need for the job.
Required Tools
To change a lawn mower blade, you need a few tools. These tools will help you safely and efficiently complete the task.
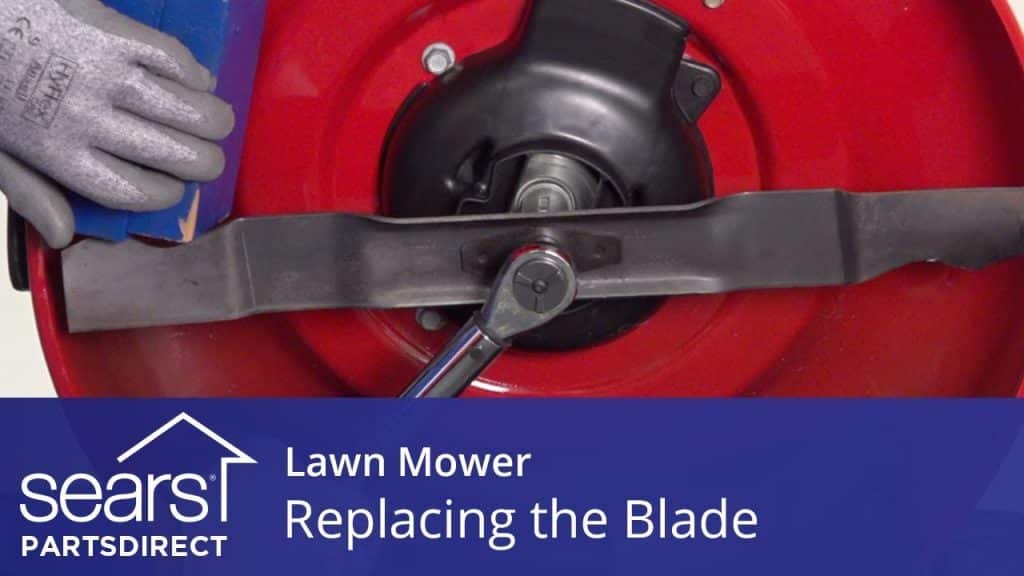
- Socket Wrench: A socket wrench is essential for loosening and tightening the blade bolt.
- Blade Holder: A blade holder keeps the blade from moving while you work.
- Work Gloves: Protect your hands with sturdy gloves. They provide a better grip and prevent injuries.
- Safety Glasses: Safety glasses protect your eyes from flying debris.
- Torque Wrench: Use a torque wrench to tighten the blade bolt to the manufacturer’s specifications.
Essential Materials
In addition to tools, you need some essential materials. These materials will help you complete the blade change effectively.
- Replacement Blade: Ensure you have the correct replacement blade for your mower model.
- Lubricant: Lubricant helps to loosen rusty or tight bolts.
- Cleaning Cloth: A cleaning cloth helps you clean the blade area before installing the new blade.
- Blade Balancer: A blade balancer ensures the new blade is properly balanced.
Preparing The Mower
Before changing the lawn mower blade, you need to prepare the mower. This step ensures your safety and helps you avoid any damage to the mower. Start by gathering all necessary tools. You will need a socket wrench, a wooden block, and a pair of gloves. Now, let’s move on to the specific steps involved in preparing your lawn mower.
Disconnecting The Spark Plug
First, disconnect the spark plug. This step is crucial for your safety. It prevents the mower from starting accidentally. Locate the spark plug on the side of the engine. Use your hand to pull off the spark plug wire. This action will deactivate the engine. Double-check to ensure the wire is completely disconnected.
Tilting The Mower Safely
Next, tilt the mower safely. Lay down a tarp or old sheet to protect your lawn. Tilt the mower on its side. Make sure the air filter faces up. This prevents fuel and oil from leaking. Use a wooden block to stabilize the mower. Make sure it does not wobble. Secure the mower in this position before moving to the next step.
Removing The Old Blade
Changing the blade on your lawn mower is an essential task to keep your lawn looking fresh. One of the critical steps in this process is removing the old blade. This guide will help you understand the steps involved in loosening the blade bolt and taking off the old blade.
Loosening The Blade Bolt
First, make sure your mower is off and the spark plug wire is disconnected. This step is crucial for your safety. Next, tilt the mower on its side, with the air filter facing up. This prevents oil and gas from leaking.
Secure the blade with a piece of wood. This prevents it from moving as you work. Use a wrench to loosen the blade bolt. Turn the bolt counterclockwise. This might require some effort, especially if the bolt is tight.
If the bolt is stuck, apply a penetrating oil like WD-40. Wait for a few minutes, then try again. The oil helps to loosen any rust or debris that might be causing the bolt to stick.
Taking Off The Old Blade
Once the bolt is loose, remove it carefully. Set it aside in a safe place. Hold the blade firmly and slide it off the mower. Check the blade for any damage or wear.
Inspect the blade adapter for any signs of wear. If it’s damaged, it should be replaced. Clean the area around the blade mount. This ensures a smooth installation of the new blade.
If your blade has washers or other small parts, keep them in order. You will need them when installing the new blade. Place the old blade in a safe location, away from children and pets.
By following these steps, you can safely and efficiently remove the old blade from your lawn mower. Always prioritize safety and take your time to ensure each step is done correctly.

Installing The New Blade
After removing the old blade, it’s time to install the new one. This step is crucial for your lawn mower’s performance. Follow these simple steps to ensure the new blade is secure and aligned correctly.
Aligning The New Blade
First, align the new blade with the mower’s spindle. Make sure the blade is facing the correct direction. Most blades have a label indicating which side should face up. You can also refer to the user manual for guidance.
Check that the blade holes match the spindle holes. This alignment is crucial for proper mowing. If the holes do not line up, the blade will not function correctly.
Tightening The Blade Bolt
Next, place the blade bolt through the blade and into the spindle. Start by hand-tightening the bolt to ensure it catches the threads properly. Use a wrench to secure the bolt firmly.
To prevent the blade from moving, you can use a block of wood. Place the wood against the blade to keep it in place. This will make it easier to tighten the bolt securely.
Finally, check the tightness of the bolt. A loose blade can be dangerous. Ensure the bolt is tight but do not over-tighten it. Over-tightening can damage the blade or the spindle.
| Step | Action |
|---|---|
| 1 | Align the new blade with the spindle. |
| 2 | Hand-tighten the blade bolt. |
| 3 | Use a wrench to secure the bolt firmly. |
| 4 | Check the tightness of the bolt. |
Reassembling The Mower
Reassembling your mower is the final step in changing the blade. This process involves a few key steps to ensure your mower is safe and ready to use. Follow these instructions carefully to complete the reassembly.
Returning The Mower To Upright Position
After securing the new blade, it’s time to return the mower to its upright position. Carefully lift the mower from the side. Make sure to avoid any sudden movements. Position the mower on a flat surface to prevent it from tipping over. This step is crucial for stability and safety.
Reconnecting The Spark Plug
Reconnecting the spark plug is essential for the mower to start. Locate the spark plug wire and reconnect it to the spark plug. Ensure it is firmly in place. This step restores the electrical connection needed for ignition. Double-check the connection for security.
Testing The Mower
After you have successfully replaced the lawn mower blade, it’s important to test the mower. This ensures everything is working correctly and safely. Testing the mower helps to identify any issues before you begin mowing your lawn.
Initial Test Run
First, find a flat, open area to start your mower. This space should be free from obstacles. Start the engine and let it run for a few minutes. Listen closely for any unusual noises. If the engine sounds normal, proceed to the next step.
Checking For Vibrations
While the mower is running, gently lift it slightly off the ground. Feel for any vibrations through the handle. Excessive vibrations could mean the blade is not balanced properly. If you feel strong vibrations, turn off the mower and check the blade installation.
If everything feels smooth, lower the mower back to the ground. Continue to monitor for any changes in sound or feel. A smooth operation means your blade replacement was successful.
Maintenance Tips
Maintaining your lawn mower blade is crucial for a healthy lawn. Proper maintenance ensures efficient and clean cuts. This section covers essential tips to keep your blade in top shape.
Regular Blade Sharpening
Sharpen your lawn mower blade regularly. A sharp blade makes cleaner cuts. It also reduces stress on your mower. Blades should be sharpened after every 20-25 hours of use. Use a sharpening stone or a file. Always wear gloves for safety. A dull blade can damage your grass. It makes your lawn look unhealthy.
Proper Storage
Store your lawn mower properly. Clean the blade before storing it. Remove any grass clippings and debris. This prevents rust and corrosion. Keep the mower in a dry place. A garage or shed works well. Cover the mower to protect it from dust. Proper storage extends the life of your blade.
Frequently Asked Questions
How Do I Know When To Change My Lawn Mower Blade?
You should change the blade when it becomes dull, chipped, or bent. A sharp blade cuts grass evenly, ensuring a healthy lawn. Inspect the blade regularly.
What Tools Are Needed To Change A Lawn Mower Blade?
You’ll need a wrench, a socket set, and a block of wood. These tools help you safely remove and replace the blade. Always wear gloves for protection.
Can I Sharpen Lawn Mower Blades Instead Of Replacing Them?
Yes, you can sharpen the blades using a file or grinder. Sharpening prolongs the blade’s life and improves mowing performance. Replace severely damaged blades.
How Do I Safely Remove A Lawn Mower Blade?
First, disconnect the spark plug to prevent accidental starts. Use a wrench to loosen the blade bolt. Secure the blade with a block of wood.
Conclusion
Changing your lawn mower blade is simple with the right steps. Follow the guide, and you’ll have a sharp, efficient mower. Remember to disconnect the spark plug for safety. Use proper tools to avoid any accidents. Regular blade maintenance ensures a healthy, green lawn.
Keep your yard looking its best. Happy mowing!
