
Winterizing your snow blower is essential. It ensures smooth operation during heavy snowfalls.
Neglecting this can lead to breakdowns and costly repairs. As winter approaches, preparing your snow blower becomes crucial. A well-maintained machine can handle the harshest conditions without fail. Winterizing involves a few key steps that protect your snow blower from damage and extend its lifespan.
Proper care means your snow blower will be ready to tackle snowstorms efficiently. This guide will help you understand the necessary steps to winterize your snow blower. By following these tips, you can ensure your equipment stays in top shape, making your winter snow removal tasks much easier. Let’s dive into the process and keep your snow blower running smoothly all season long.
Preparing The Snow Blower
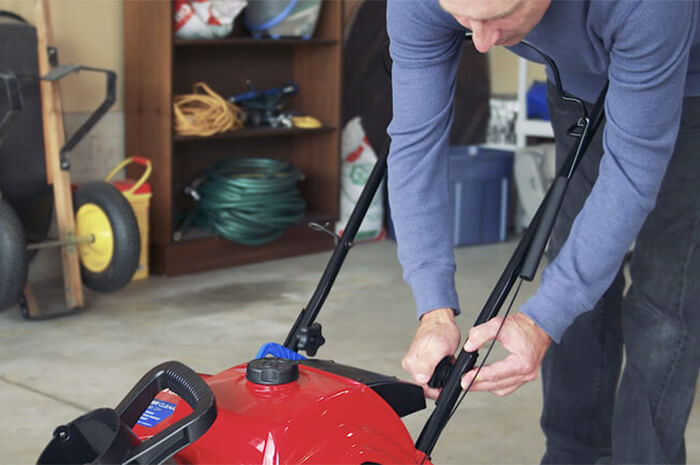
Winter is around the corner, and it’s time to get your snow blower ready. Proper preparation ensures that your machine works efficiently throughout the season. Here are some steps to help you get started with preparing your snow blower for winter.
Clean The Machine
Before storing or using your snow blower, make sure it is clean. Remove any dirt, debris, and snow that may have accumulated on the machine. A clean machine works better and lasts longer.
Use a brush and a damp cloth to wipe down the exterior. Pay special attention to the auger and chute, as these areas often collect the most debris. For tough spots, a mild detergent can help. Rinse thoroughly and let the machine dry completely.
| Parts to Clean | Tools Needed |
|---|---|
| Exterior | Brush, damp cloth |
| Auger | Brush, mild detergent |
| Chute | Brush, mild detergent |
Check For Damage
Inspect your snow blower for any signs of damage. Look at the belts, auger, and scraper bar. Replace any worn or damaged parts to ensure smooth operation.
Check the tires for proper inflation. Properly inflated tires provide better traction and handling. Also, ensure that all nuts and bolts are tight. Loose parts can lead to serious mechanical issues.
- Inspect belts and replace if frayed.
- Check the auger for dents or cracks.
- Ensure the scraper bar is not worn down.
- Inflate tires to the recommended pressure.
- Tighten all nuts and bolts.
Regular maintenance can prevent costly repairs and extend the life of your snow blower. By following these steps, you can be confident that your machine will be ready to tackle any snowstorm that comes your way.
Changing The Oil
Changing the oil in your snow blower is a key step in winterizing it. Clean oil ensures your machine runs smoothly and lasts longer. Regular oil changes prevent engine wear and tear. Follow these steps to change the oil in your snow blower.
Choose The Right Oil
Select oil that matches the manufacturer’s recommendations. Check your snow blower manual for the correct type and viscosity. Typically, a 5W-30 oil works best for cold temperatures. Using the right oil helps your engine perform better in the winter months.
Drain And Refill
First, run the snow blower for a few minutes. Warm oil drains more easily. Next, turn off the engine and disconnect the spark plug. Place a pan under the oil drain plug. Remove the plug and let the oil drain completely.
Once the oil has drained, replace the drain plug. Fill the engine with the new oil, using a funnel to avoid spills. Check the oil level with the dipstick. Ensure it’s at the correct level, but do not overfill. Reconnect the spark plug and run the engine for a few minutes to circulate the new oil.
Fuel System Maintenance
Ensuring your snow blower’s fuel system is well-maintained is crucial for winterization. Proper care can prevent common issues like fuel clogs, engine stalling, and hard starts. Below, you’ll find simple steps for maintaining the fuel system of your snow blower.
Add Fuel Stabilizer
Adding a fuel stabilizer is the first step. This product helps keep the fuel fresh and prevents it from gumming up the engine. Follow these steps to add a fuel stabilizer:
- Purchase a high-quality fuel stabilizer from a hardware store.
- Read the instructions on the stabilizer bottle for the correct amount.
- Pour the stabilizer into the fuel tank.
- Fill the tank with fresh gasoline to mix with the stabilizer.
Adding a fuel stabilizer can extend the life of your fuel and keep your engine running smoothly.
Run The Engine
After adding the fuel stabilizer, run the engine. This step ensures the stabilizer spreads through the system. Follow these steps:
- Start the snow blower engine.
- Let the engine run for 5-10 minutes.
- Ensure the stabilizer circulates through the carburetor and fuel lines.
- Turn off the engine and store the blower in a dry place.
Running the engine after adding stabilizer helps keep the internal parts lubricated and ready for the next winter season.
Inspecting The Belts And Pulleys
Winterizing your snow blower is essential for its longevity. One crucial step is inspecting the belts and pulleys. These components help your snow blower operate smoothly. Checking them ensures your machine is ready for the winter season.
Check For Wear
Start by inspecting the belts for any signs of wear. Look for cracks, fraying, or any other damage. A worn belt can break during use, causing your snow blower to stop working. Replace any damaged belts immediately.
Next, examine the pulleys. Ensure they are free from debris and properly aligned. Misaligned pulleys can cause the belts to wear out faster. Clean the pulleys if needed and check their condition.
Adjust Tension
Proper belt tension is crucial for optimal performance. If the belts are too loose, they can slip off. If too tight, they can cause excessive wear.
- Locate the tension adjuster on your snow blower.
- Loosen the adjuster and move the belt until it has the right tension.
- Tighten the adjuster back in place.
After adjusting, test the tension by pressing on the belt. It should have a bit of give but not too much. Proper tension ensures your snow blower runs smoothly and efficiently.
| Component | Action |
|---|---|
| Belts | Check for wear and replace if damaged. |
| Pulleys | Clean and ensure proper alignment. |
| Tension | Adjust to optimal level. |
Inspecting the belts and pulleys is a key step in winterizing your snow blower. It helps ensure that your machine is ready to tackle the snow and work efficiently throughout the season.
Lubricating Moving Parts
Proper lubrication of your snow blower’s moving parts is essential for its longevity. It ensures smooth operation and reduces wear and tear. This section will guide you through the steps to lubricate critical components of your machine.
Grease Bearings
Bearing lubrication is crucial to keep your snow blower running smoothly. Locate the grease fittings on the bearings. Use a grease gun to apply lubricant. Pump grease until it seeps out of the bearing. Wipe away excess grease with a clean rag.
Oil Cables And Controls
Cables and controls need regular oiling to prevent rust and ensure smooth movement. Identify the control cables and pivot points. Apply a few drops of oil to each cable. Move the controls to work the oil in. Ensure all pivot points are well-lubricated. Clean off any excess oil to avoid dirt buildup.
These simple steps will help maintain your snow blower. Regular lubrication keeps it functioning efficiently throughout the winter season.
Replacing The Spark Plug
Replacing the spark plug in your snow blower is an essential step in winterizing it. A fresh spark plug ensures your machine starts easily and runs smoothly. This simple task can save you a lot of trouble during a snowstorm. Follow these steps to replace the spark plug.
Remove Old Plug
First, locate the spark plug. It’s usually found on the front or side of the engine. Use a spark plug wrench to loosen and remove the old plug. Be careful not to damage the surrounding parts. Inspect the old spark plug for any signs of wear or damage. This can help you understand the condition of your engine.
Install New Plug
Take the new spark plug out of its packaging. Check the gap with a spark plug gap tool. Adjust it if necessary to match the manufacturer’s specifications. Carefully screw the new plug into the engine by hand. Use the spark plug wrench to tighten it, but don’t over-tighten. Reconnect the spark plug wire securely. Your snow blower is now one step closer to being winter-ready.
Storing The Snow Blower
Proper storage is vital to keep your snow blower in good condition. This ensures it will be ready for use next winter. Let’s discuss how to store it correctly.
Choose A Dry Location
Select a dry spot to store your snow blower. Moisture can cause rust and damage. A garage or shed is ideal. Make sure the location is free from leaks. Avoid storing it near windows where rain can seep in.
Cover The Machine
Cover the snow blower to protect it from dust and debris. Use a breathable cover to avoid trapping moisture. Plastic covers can cause condensation. Instead, choose a fabric cover made for outdoor tools. This keeps the machine clean and dry.
Safety Precautions
Winterizing your snow blower is crucial for its longevity. Safety should always come first. Before you start, take important safety precautions. This helps prevent accidents and injuries.
Wear Protective Gear
Always wear protective gear. Gloves protect your hands from sharp parts. Safety glasses shield your eyes from debris. Sturdy boots give you better grip and protect your feet. Ear protection can prevent hearing damage from loud noises.
Follow Manufacturer Guidelines
Read the manufacturer’s manual. It contains specific instructions for your snow blower model. Follow these guidelines to avoid mistakes. The manual often includes safety tips unique to your machine. Ignoring these can lead to accidents.
Frequently Asked Questions
How Do I Winterize My Snow Blower?
To winterize your snow blower, clean it thoroughly, change the oil, add fuel stabilizer, and inspect the belts, tires, and auger.
Why Is Fuel Stabilizer Important For Winterizing?
Fuel stabilizer prevents the fuel from degrading and clogging the carburetor, ensuring your snow blower starts easily next season.
Should I Change The Oil Before Winter?
Yes, changing the oil before winter removes dirt and contaminants, ensuring smooth operation and longevity of your snow blower.
How Do I Store My Snow Blower?
Store your snow blower in a dry, cool place, covered with a tarp to protect it from dust and moisture.
Conclusion
Winterizing your snow blower ensures it runs smoothly next season. Follow the steps outlined to protect your equipment. Proper maintenance saves you time and money. Always check for damaged parts and replace them. Clean the machine thoroughly before storing. Store it in a dry, safe place.
Remember, a well-maintained snow blower will last longer. Take care of your tools; they take care of you. Happy winterizing!

