Testing your lawn mower battery is crucial. It ensures your mower runs smoothly.
Knowing how to test your lawn mower battery can save you time and frustration. A dead battery can halt your mowing plans and lead to costly replacements. In this guide, you’ll learn simple steps to check the health of your lawn mower battery.
Whether your mower is electric or gas-powered with a starter, a healthy battery is essential. Understanding how to test it can help you maintain your lawn mower better and avoid unexpected failures. So, let’s dive into the process and keep your mower in top shape!

Safety Precautions
Testing a lawn mower battery is not difficult. But you need to follow some safety precautions to avoid accidents. This section will guide you through the necessary steps to ensure your safety.
Wearing Protective Gear
Before starting, wear the right protective gear. Use safety glasses to protect your eyes from sparks. Wear gloves to shield your hands from any harmful chemicals or injuries.
Ensuring Proper Ventilation
Test the battery in an open area. This ensures proper ventilation. Batteries can release harmful gases. Good ventilation reduces the risk of inhaling these gases.
Follow these safety tips to keep yourself safe:
- Never smoke near the battery.
- Keep the battery away from open flames.
- Work in an area with good airflow.

Locating The Battery
Testing your lawn mower battery starts with finding it first. The battery powers the mower, so knowing where it is matters. Follow these steps to locate it easily.
Identifying Battery Type
Lawn mowers use different types of batteries. Look at your mower’s manual. It will tell you the battery type. Common types include lead-acid and lithium-ion.
Check the battery label. It will show the type and voltage. This information is important for testing. Always wear gloves and safety glasses when handling batteries.
Accessing The Battery Compartment
Find the battery compartment on your lawn mower. It is usually under the seat or hood. Some mowers have it near the engine. Check the manual if unsure.
Remove any covers or screws holding the compartment. Use a screwdriver if needed. Be careful not to damage the wires or connectors. Once open, you can see the battery.
Now you are ready to test the lawn mower battery. Follow the steps in the next section for a detailed guide.
Visual Inspection
Performing a visual inspection of your lawn mower battery is crucial. It helps identify any visible issues that might impact performance. This is an easy first step before using any tools.
Checking For Corrosion
Corrosion can significantly affect your battery’s performance. Look closely at the battery terminals and cables. Are there any white, ashy deposits? These are signs of corrosion.
Use a mixture of baking soda and water to clean it. Apply the mixture with an old toothbrush. Scrub gently to remove the deposits. Rinse with water and dry thoroughly.
Inspecting Battery Terminals
Battery terminals need to be in good condition for efficient operation. Look for any signs of damage or wear. Are the terminals cracked or loose? These issues can prevent proper electrical connection.
Ensure the terminals are tight and secure. Loose terminals can cause starting problems. If you find damaged terminals, consider replacing them. This simple step can improve your lawn mower’s performance.

Testing With A Multimeter
Testing your lawn mower battery with a multimeter is easy and accurate. This device helps determine the battery’s health. Follow these simple steps to check your battery’s voltage and ensure your mower runs smoothly.
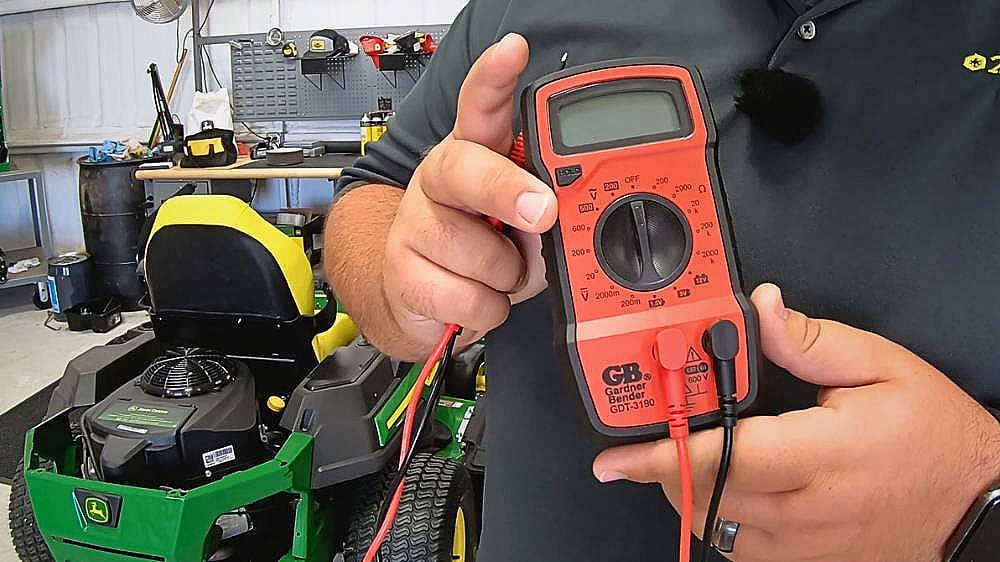
Setting Up The Multimeter
First, ensure your multimeter is set to measure voltage. Turn the dial to the “DC Voltage” section. This is often marked with a “V” and a straight line. Connect the black probe to the common port. Then, attach the red probe to the voltage port.
Make sure your lawn mower battery is accessible. Remove any covers or housings as needed. Ensure the battery terminals are clean. Dirt or corrosion can affect readings. Safety first: wear gloves and eye protection.
Measuring Battery Voltage
Touch the black probe to the negative terminal of the battery. Then, touch the red probe to the positive terminal. Check the multimeter display. A healthy 12-volt battery should read around 12.6 volts. If the reading is below 12.4 volts, the battery may need charging. Below 12 volts? The battery could be failing.
Repeat the process to confirm the reading. Consistency is key. If the readings vary, the battery might be unreliable. Regular testing helps maintain your lawn mower’s performance.
Load Testing The Battery
Testing your lawn mower battery is essential. It ensures your mower works efficiently. Load testing is a key method to check the battery’s health. This process helps you understand the battery’s performance under actual working conditions.
Understanding Load Testing
Load testing involves applying a load to the battery. This mimics the actual use of the battery. By doing this, you can see how well the battery holds up. It helps identify any weaknesses or potential failures.
Load testing measures the battery’s voltage drop under a specific load. This gives a clear picture of its capacity and condition. A healthy battery will maintain voltage. A weak battery will show a significant drop.
Performing The Load Test
Before starting, gather the necessary tools. You will need a load tester, safety gloves, and safety glasses. Follow these steps to perform the load test:
- Ensure the battery is fully charged.
- Turn off the lawn mower and remove the battery.
- Connect the battery to the load tester.
- Set the tester to the correct load for your battery.
- Activate the tester and observe the voltage reading.
- Record the voltage drop and compare it to the battery’s specifications.
Use the following table to understand the voltage drop readings:
| Voltage Drop | Battery Condition |
|---|---|
| 0.1V – 0.2V | Good |
| 0.3V – 0.4V | Moderate |
| 0.5V or higher | Weak |
A voltage drop of 0.1V to 0.2V indicates a good battery. If the drop is 0.3V to 0.4V, the battery is moderate. A drop of 0.5V or higher means the battery is weak.
Load testing helps ensure your lawn mower battery is in good condition. It prevents unexpected failures and keeps your mower running smoothly.
Interpreting Results
Testing your lawn mower battery is essential for its longevity. Once you’ve completed the tests, interpreting the results is crucial. This will help you know if your battery is healthy or needs replacing.
Voltage Readings Explained
A good lawn mower battery should have a voltage reading between 12.6 and 12.8 volts. Readings lower than this suggest the battery may be weak. If the reading is below 12 volts, the battery is likely failing.
Use a multimeter to get accurate voltage readings. Connect the multimeter’s red probe to the battery’s positive terminal. Connect the black probe to the negative terminal. This will show the battery’s voltage on the multimeter screen.
Load Test Results Analysis
A load test checks if the battery can hold a charge under a load. Start by connecting a load tester to the battery. Apply a load equal to the mower’s starter motor for 10 seconds.
During the test, the voltage should not drop below 9.6 volts. If it does, the battery may not hold a charge well. This indicates that the battery could fail soon. Replace the battery if it fails the load test.
Regularly testing your lawn mower battery ensures it stays in good condition. Knowing how to interpret the results helps you maintain your mower effectively.
Maintaining Lawn Mower Battery
Maintaining your lawn mower battery is essential for ensuring a long lifespan and smooth performance. Regular maintenance can prevent unexpected breakdowns and save you money in the long run. By following a few simple steps, you can keep your battery in top shape and ready for use whenever needed.
Cleaning Battery Terminals
Dirty battery terminals can lead to poor performance and reduced lifespan. To clean them, start by disconnecting the battery cables. Use a wire brush or a terminal cleaner to scrub the terminals gently. Remove any corrosion or dirt buildup. After cleaning, apply a thin layer of petroleum jelly to prevent future corrosion.
Storing Battery Properly
Proper storage is crucial for maintaining your lawn mower battery. When not in use, store the battery in a cool, dry place. Avoid exposing it to extreme temperatures. If you live in a cold climate, bring the battery indoors during winter. Charge the battery fully before storing to prevent discharge.
Frequently Asked Questions
How Do I Know If My Lawn Mower Battery Is Bad?
Check for slow engine cranking, dim lights, or a non-starting mower. Test battery voltage with a multimeter.
Can You Test A Lawn Mower Battery With A Multimeter?
Yes, you can test a lawn mower battery with a multimeter. Set it to DC volts and check the voltage.
How Do You Know When You Need A New Lawn Mower Battery?
Your lawn mower battery needs replacing if it struggles to start, holds charge poorly, or appears corroded.
At What Voltage Is A Lawn Mower Battery Dead?
A lawn mower battery is considered dead if it reads below 12. 0 volts. Regularly check the voltage to maintain performance.
Conclusion
Testing your lawn mower battery is simple and important. Regular checks ensure your mower runs smoothly. Use a multimeter for accurate readings. Clean terminals and connections to prevent issues. Replace the battery if needed. With these steps, your lawn mower will stay in top condition, ready for use.
Happy mowing!
