
Replacing a lawn mower battery can seem tricky. But, it’s simpler than you think.
In this guide, you’ll learn the steps to replace it easily. Lawn mowers are essential for keeping our lawns neat. Over time, their batteries wear out. When this happens, knowing how to replace the battery is crucial. A dead battery can turn a simple task into a frustrating chore.
Replacing it yourself saves time and money. You don’t need to call a technician or buy a new mower. With a few tools and some patience, you’ll have your lawn mower running smoothly again. This guide will walk you through the process, ensuring your lawn stays pristine. Let’s dive in!
Safety Precautions
Before replacing a lawn mower battery, always wear safety gloves and goggles. Disconnect the spark plug to avoid accidental starts. Ensure you work in a well-ventilated area.
Replacing a lawn mower battery involves handling electrical components. Safety is crucial to avoid accidents. Follow these precautions to ensure a safe process. Protect yourself and avoid any mishaps.Wearing Protective Gear
Before starting, wear protective gear. Use safety glasses to shield your eyes from sparks. Gloves protect your hands from battery acid. Wear long sleeves to avoid burns or cuts. Sturdy shoes prevent injuries from dropped tools.Disconnecting The Battery Safely
First, turn off the lawn mower. Disconnect the spark plug to prevent accidental starts. Locate the battery and identify the negative terminal. Use a wrench to loosen the negative cable first. Move it aside carefully. Next, loosen the positive terminal. Remove the battery from its compartment. Store the old battery safely. By following these safety precautions, you can replace your lawn mower battery without any issues. “`
Locating The Battery
Replacing your lawn mower battery can seem daunting. But, it’s simple if you know where to start. The first step in this task is locating the battery in your lawn mower. The battery is usually located in an easy-to-reach spot. Let’s break down the process into two simple steps.
Finding The Battery Compartment
Most lawn mowers have a battery compartment. It’s often found under the seat or hood. Check your mower’s manual for precise information. Look for a square or rectangular compartment. It should be easy to spot.
Removing The Battery Cover
Once you find the battery compartment, you need to remove the cover. This cover is usually secured with screws or clips. Use a screwdriver or your hands to loosen and remove them. Be gentle to avoid damaging any parts. The battery should now be visible and ready for the next steps.
Removing The Old Battery
Removing the old battery from your lawn mower is a crucial step. This process ensures that your mower continues to run smoothly. Follow these steps carefully to avoid any issues.
Disconnecting The Terminals
First, locate the battery terminals. These are typically found under the mower’s seat or hood. Use a wrench to loosen the nuts on the terminal posts. Always disconnect the negative terminal first to prevent short circuits. After that, disconnect the positive terminal. Make sure the wires are safely tucked away to avoid any contact.
Lifting The Battery Out
Once the terminals are disconnected, you can remove the battery. Grasp the battery firmly with both hands. Lift it straight up and out of its compartment. If the battery is heavy, use both hands to support it. Place the old battery in a safe location for disposal or recycling.
Preparing The New Battery
Replacing your lawn mower battery can seem daunting. Proper preparation makes the process smooth. This section covers the essential steps to ensure your new battery fits perfectly and functions optimally. Follow these steps for a hassle-free replacement experience.
Checking Compatibility
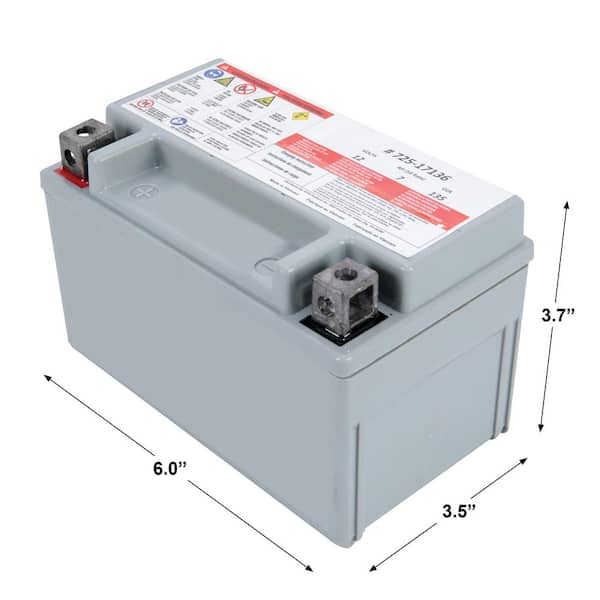
Before you install the new battery, ensure it is compatible with your lawn mower. Check the owner’s manual for the correct battery specifications. Look at the battery’s voltage and size. These details are crucial.
Here is a quick checklist to verify compatibility:
- Voltage (e.g., 12V)
- Battery size and dimensions
- Terminal type
- Amperage rating
Use this information to match your new battery with the old one. If there is a mismatch, you might face issues with the installation.
Cleaning The Terminals
Dirty or corroded terminals can hinder the performance of your new battery. Clean the terminals before you install the new battery. Gather these materials:
- Baking soda
- Water
- Wire brush
- Clean cloth
Follow these steps to clean the terminals:
- Mix baking soda and water to form a paste.
- Apply the paste to the terminals.
- Scrub gently with a wire brush.
- Wipe clean with a cloth.
Make sure the terminals are dry before attaching the new battery. Clean terminals ensure better connectivity and longer battery life.
Installing The New Battery
Replacing a lawn mower battery is a simple task. Follow these steps to safely and effectively install your new battery. Ensure your mower is turned off and parked on a flat surface. Let’s get started with the installation process.
Placing The Battery In The Compartment
First, locate the battery compartment. It is usually under the seat or the mower’s hood. Open the compartment and remove any debris. Carefully place the new battery into the compartment. Make sure it fits snugly and is properly aligned.
Connecting The Terminals
Next, connect the terminals. Begin with the positive terminal. It is often marked with a red cap or a plus sign (+). Attach the red cable to the positive terminal and tighten the bolt. Ensure the connection is secure.
Now, connect the negative terminal. It is usually marked with a black cap or a minus sign (-). Attach the black cable to the negative terminal. Tighten the bolt securely. Double-check both connections to avoid any loose wires.
With the new battery installed, close the battery compartment. Start your mower to ensure everything is working properly. Enjoy the smooth operation of your lawn mower with its new battery.
Securing The Battery
After installing the new battery, securing it is crucial. Ensuring the battery is in place prevents it from moving. Movement can cause damage or disconnections.
Reattaching The Battery Cover
First, locate the battery cover. Align it with the battery compartment. Ensure it fits snugly without forcing it. Once aligned, use screws to secure it. Tighten the screws but avoid over-tightening.
Ensuring Stability
Check the battery for any movement. It should be firm and stable. If it moves, recheck the connections. Use additional straps if needed. A stable battery ensures safe and efficient mower operation.
Testing The New Battery
After replacing the lawn mower battery, it’s crucial to ensure it works correctly. Testing the new battery guarantees that your mower is ready for use. Follow these steps to test the new battery effectively.
Starting The Lawn Mower
First, make sure the new battery is securely connected. Tighten the terminals if needed. Next, insert the key into the ignition and turn it to the start position. Listen for the engine to crank. The engine should start smoothly without any delay.
Checking For Proper Functioning
Once the engine is running, observe the mower’s performance. Ensure that the engine runs steadily and does not stall. Check the headlights if your mower has them. They should shine brightly, indicating a strong battery.
| Steps | Details |
|---|---|
| 1. Secure Connection | Check battery terminals for tightness. |
| 2. Insert Key | Turn the key to start the engine. |
| 3. Listen for Crank | Ensure the engine starts without delay. |
| 4. Observe Performance | Check engine stability and headlights. |
If you notice any issues, double-check the battery installation. Ensure the connections are clean and free of corrosion. A well-installed battery ensures your lawn mower functions correctly.

Maintenance Tips
Maintaining your lawn mower battery ensures its longevity and efficiency. Regular maintenance can prevent unexpected issues and extend the battery’s life. Here are some essential maintenance tips to keep your lawn mower battery in top shape.
Regular Inspection
Inspect your lawn mower battery regularly for signs of wear or damage. Look for any corrosion on the terminals. Corrosion can affect the battery’s performance. Clean the terminals with a mixture of baking soda and water. Use a wire brush for stubborn buildup. Check the battery’s charge level often. A fully charged battery lasts longer and performs better.
Proper Storage
Store your lawn mower in a cool, dry place. Extreme temperatures can damage the battery. Disconnect the battery if you’re storing the mower for a long period. Charge the battery before storage. A fully charged battery resists damage from cold temperatures. Use a battery maintainer to keep the charge level steady. This prevents the battery from dying during storage.
Frequently Asked Questions
How Do I Know If My Lawn Mower Battery Is Bad?
If your lawn mower struggles to start, the battery might be bad. Check for dim lights or a clicking sound when starting.
What Tools Do I Need To Replace The Battery?
You typically need a wrench, gloves, and a new battery. Always consult your lawn mower’s manual for specific tools required.
How Often Should I Replace My Lawn Mower Battery?
Lawn mower batteries usually last 3-5 years. Replace them if you notice reduced performance or starting issues.
Can I Use Any 12v Battery For My Lawn Mower?
Not all 12V batteries are the same. Ensure the new battery matches the specifications in your lawn mower’s manual.
Conclusion
Replacing your lawn mower battery is a straightforward task. Follow the steps carefully. Always prioritize safety by wearing gloves. Disconnect the old battery properly. Install the new battery securely. Test your lawn mower to ensure it works. Regular maintenance can extend your lawn mower’s life.
Keep your tools and workspace organized. This helps avoid accidents. Now, you can enjoy a well-maintained lawn mower. Happy mowing!
