Installing riding lawn mower blades can seem tricky. But it’s easier than you think.
Proper blade installation ensures a clean, even cut and keeps your lawn healthy. It also extends the life of your mower. In this guide, you’ll learn simple steps to install new blades on your riding lawn mower. Whether you’re a seasoned gardener or a beginner, this process is straightforward.
Follow along to make your lawn mowing efficient and safe. Ready to get started? Let’s dive in and make your lawn mower work like new again!
Tools And Materials Needed
Installing riding lawn mower blades can seem daunting, but with the right tools and materials, it becomes manageable. This section will outline the essential tools and safety gear needed to get the job done efficiently.
Essential Tools
Having the correct tools is crucial for a smooth installation process. Here’s what you need:
- Socket Wrench Set: For loosening and tightening bolts.
- Blade Removal Tool: Helps secure the blade while you work.
- Torque Wrench: Ensures bolts are tightened correctly.
- Jack and Jack Stands: To lift and support your mower.
- Work Gloves: Protect your hands from sharp edges.
Safety Gear
Safety should always come first. Equip yourself with the following gear:
- Safety Glasses: Protect your eyes from debris.
- Work Gloves: Safeguard your hands from cuts and bruises.
- Sturdy Footwear: Prevents slips and foot injuries.
- Ear Protection: Shields your ears from loud noises.
Using the right tools and safety gear will make the blade installation safer and more effective.
Preparation Steps
Before installing riding lawn mower blades, proper preparation is essential. This ensures safety and efficiency. The following steps will help you get ready for the task.
Safety Precautions
Safety should always come first. Wear gloves to protect your hands. Use safety goggles to shield your eyes from debris. Disconnect the spark plug to prevent accidental starts. Keep children and pets away from the work area.
Positioning The Mower
Find a flat, level surface to park your mower. Engage the parking brake to keep it from moving. Lift the mower deck to its highest position. This gives you more room to work underneath.
Use a jack or lift to raise the mower if needed. Ensure it is stable before you begin. Now, you are ready to start the blade installation process.
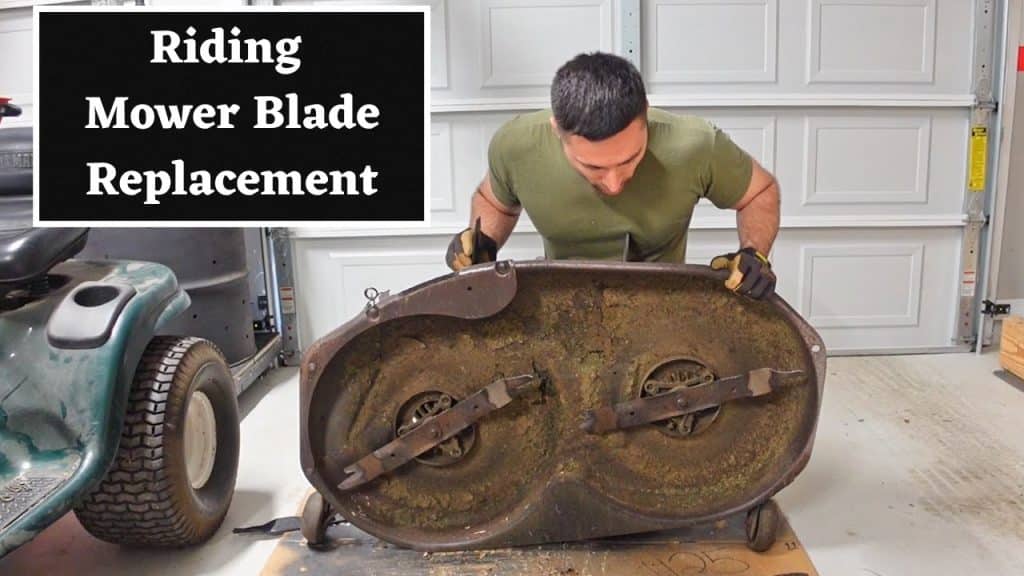
Removing The Old Blades
To remove old blades from a riding lawn mower, secure the mower and use a wrench to loosen the bolts. Carefully detach the blades for replacement.
Removing the old blades from your riding lawn mower is necessary. First, you need to lift the mower safely. Then, you can loosen the blade bolts. This section will guide you through these steps.Lifting The Mower
Lifting the mower is the first step. Use a floor jack to raise the mower. Place the jack under the front axle. Lift until the mower is high enough to access the blades. Always use jack stands for safety.Loosening The Blade Bolts
Loosening the blade bolts can be challenging. Wear heavy gloves to protect your hands. Use a socket wrench to turn the bolts counterclockwise. If the bolts are tight, apply some penetrating oil. This will help loosen them. Once the bolts are loose, remove them by hand. “`
Inspecting The Mower Deck
Before installing new riding lawn mower blades, always inspect the mower deck. This step ensures the deck is in good condition. It also helps to maintain your mower’s performance. Below are some tasks to complete during inspection:
Cleaning The Deck
Cleaning the deck is essential. A clean deck prevents grass buildup. Follow these steps:
- First, disconnect the spark plug for safety.
- Next, raise the mower to access the deck.
- Use a garden hose to remove loose debris.
- Scrape off dried grass and dirt with a putty knife.
Regular cleaning keeps the deck in good shape. It also improves cutting efficiency.
Checking For Damage
Inspecting the deck for damage is crucial. Look for the following:
- Check for any cracks or rust spots.
- Ensure the deck is not warped.
- Inspect the spindle assembly for wear.
If you find any issues, address them before installing new blades. A damaged deck can affect blade performance and mower safety.
Use these tips to keep your mower deck in top condition. A well-maintained deck ensures a smooth cutting experience every time.
Installing The New Blades
Replacing the blades on your riding lawn mower is essential for maintaining a healthy lawn. Once you have removed the old blades, it’s time to install the new ones. This process is straightforward, but you must take care to do it correctly. Below, we will guide you through the steps, ensuring your mower runs efficiently and safely.
Aligning The Blades
First, place the new blade onto the spindle. The blade’s center hole should align perfectly with the spindle bolt. Ensure the sharp edge of the blade is facing the direction of rotation. Double-check that the blade sits flat against the spindle. This alignment is crucial for even cutting.
Securing The Blade Bolts
Once the blade is aligned, it’s time to secure it. Insert the blade bolt through the center hole. Hand-tighten the bolt to hold the blade in place. Use a wrench to tighten the bolt further. Make sure it is snug but not overly tight. A torque wrench can help ensure you use the correct pressure, usually around 70-90 ft-lbs. Properly secured bolts prevent the blade from wobbling.
Repeat these steps for each blade on your mower. Always check that all bolts are secure before you finish. This will ensure your lawn mower operates safely and efficiently.
Tightening And Testing
Once you have installed the new blades on your riding lawn mower, the next crucial step is tightening and testing. Proper tightening ensures the blades are secure and function effectively. Testing verifies the blades are correctly installed and safe for use.
Torque Specifications
Each riding lawn mower model comes with specific torque specifications for the blades. These specifications are usually found in the user manual. It is essential to adhere to these specifications to avoid over-tightening or under-tightening the blades.
| Model | Torque (ft-lbs) |
|---|---|
| Model A | 50-60 |
| Model B | 60-70 |
| Model C | 70-80 |
Use a torque wrench to tighten the blade bolts. This ensures you apply the right amount of pressure. Here’s a simple step-by-step guide:
- Set the torque wrench to the specified value.
- Place the wrench on the blade bolt.
- Turn the wrench until it clicks.
Testing Blade Rotation
After tightening the blades, testing blade rotation is the next step. This ensures the blades move freely and are correctly aligned.
Follow these steps for a quick test:
- Turn off the mower and disconnect the spark plug.
- Manually rotate the blades.
- Check for any resistance or unusual noise.
If the blades rotate smoothly, they are properly installed. If not, recheck the installation and torque specifications.
For a final test, start the mower and engage the blades. Listen for any odd sounds. Ensure the mower cuts grass evenly.
Proper tightening and testing of your riding lawn mower blades ensure safety and efficiency. Regular maintenance keeps your mower in top shape, providing a clean and even cut every time.
Reassembling The Mower
After installing the new blades, the next step is reassembling the mower. Proper reassembly ensures safety and optimal performance. Follow these steps to reassemble your riding lawn mower correctly.
Lowering The Mower
First, use the jack to lower the mower back to the ground. Make sure the mower sits firmly and evenly on the surface. Check that the mower deck is in its lowest position. This will make it easier to reattach any parts.
- Gently lower the mower deck.
- Ensure even contact with the ground.
- Verify the stability of the mower.
Reattaching Safety Covers
Next, reattach the safety covers that were removed earlier. These covers are essential for protecting you from the moving blades. Align the covers with their original positions and secure them tightly.
- Place the cover in its correct spot.
- Secure screws or bolts tightly.
- Double-check the alignment and fit.
Don’t forget to reconnect any electrical connections you may have disconnected. These could be for safety switches or sensors. Ensure all connections are secure and in proper working condition.
With the mower reassembled, you are ready to start mowing again. Always perform a safety check before use to ensure everything is in place and functioning correctly.
Maintenance Tips
Maintaining your riding lawn mower blades is crucial for a smooth cut. Regular maintenance ensures the blades stay sharp and effective. This section covers essential maintenance tips for your mower blades.
Blade Sharpening
Sharpen the blades every 20 to 25 hours of mowing. Use a file or grinder for best results. Always wear gloves and safety glasses during sharpening. Balance the blade after sharpening to avoid vibrations. An unbalanced blade can damage your mower.
Regular Inspections
Inspect the blades before each mowing session. Look for nicks, bends, or rust. Replace damaged blades immediately. Regular inspections prevent bigger issues and ensure a clean cut. Check the bolts holding the blades. Tighten if necessary. Loose bolts can cause the blade to detach.

Frequently Asked Questions
How Do You Remove A Riding Lawn Mower Blade?
To remove a riding lawn mower blade, disconnect the spark plug, wear safety gloves, and use a wrench to unscrew the blade bolt. Carefully remove the blade.
What Tools Are Needed To Install Mower Blades?
To install mower blades, you need a wrench, socket set, blade removal tool, and safety gloves. These tools ensure a safe and efficient installation process.
How Often Should Mower Blades Be Replaced?
Mower blades should be replaced every season or after 25 hours of use. Dull blades affect cutting performance and lawn health.
Can I Sharpen Mower Blades Instead Of Replacing?
Yes, you can sharpen mower blades instead of replacing them. Use a blade sharpener or file to maintain their cutting efficiency.
Conclusion
Changing riding lawn mower blades is straightforward. Follow the steps carefully. This ensures a smooth, efficient cut. Regular maintenance extends your mower’s life. Keep tools handy. Safety first. Always wear gloves. Check the blade’s sharpness. Replace if dull. Consult your manual for specifics.
Enjoy a well-cut lawn. Happy mowing!
