
Dethatching a lawn keeps it healthy and vibrant. A mower attachment can make this job easier and more efficient.
Do you want to know how to dethatch your lawn using a mower attachment? This method can save you time and effort, ensuring a lush and green lawn. Dethatching removes the layer of dead grass and debris that prevents water and nutrients from reaching the soil.
Using a mower attachment streamlines this process, making it more accessible for homeowners. In this guide, we will explore the steps to dethatch a lawn effectively with a mower attachment. Get ready to give your lawn the care it deserves!
Introduction To Lawn Dethatching
Maintaining a healthy lawn involves regular care and attention. One crucial step often overlooked is dethatching. Dethatching helps your grass grow stronger and healthier. Using a mower attachment makes this task easier and faster.
What Is Dethatching?
Dethatching removes the layer of dead grass, roots, and other debris. This layer, known as thatch, can prevent water, nutrients, and air from reaching the soil. A thick thatch layer can harm your lawn. Dethatching helps eliminate this problem.
Benefits Of Dethatching
There are many benefits to dethatching your lawn:
- Improves Air Circulation: Dethatching allows air to reach the soil and roots, promoting healthy growth.
- Enhances Water Absorption: Water can penetrate the soil better, helping the grass absorb essential nutrients.
- Prevents Disease: Thatch can harbor pests and diseases. Removing it reduces these risks.
- Promotes New Growth: Dethatching encourages new grass to grow, making your lawn look lush and green.
Regular dethatching keeps your lawn looking its best. Using a mower attachment simplifies the process.
Choosing The Right Mower Attachment
Dethatching a lawn is vital for maintaining its health. The right mower attachment makes the job easier and more effective. Let’s explore the different types of dethatching attachments and the factors you should consider when choosing one.
Types Of Dethatching Attachments
There are several types of dethatching attachments available. Each type serves a specific purpose and suits different lawn conditions. Here are the main types:
- Dethatching Blades: These blades attach to your existing mower. They cut through the thatch layer and pull it to the surface.
- Dethatching Rakes: These rakes attach to the front of your mower. They use tines to comb through the lawn and remove thatch.
- Power Rakes: These are motorized attachments. They provide a more aggressive dethatching and work well for heavily thatched lawns.
Factors To Consider
When choosing a dethatching attachment, consider the following factors:
| Factor | Details |
|---|---|
| Lawn Size | For large lawns, a power rake is efficient. For smaller lawns, dethatching blades or rakes are sufficient. |
| Thatch Thickness | Thicker thatch layers require a more aggressive approach. Power rakes are ideal for thick thatch. |
| Lawn Health | Delicate lawns benefit from gentler dethatching. Use dethatching blades or rakes to avoid damage. |
| Attachment Compatibility | Ensure the attachment fits your mower. Check the manufacturer’s specifications. |
Choosing the right attachment makes dethatching easier and protects your lawn. Consider your lawn’s specific needs and select the best tool for the job.
Preparing Your Lawn For Dethatching
Preparing your lawn before dethatching ensures effective results. This step is crucial for achieving a healthy, lush lawn. Follow these guidelines to prepare your lawn properly.
Assessing Thatch Levels
First, assess the thatch levels in your lawn. Thatch is a layer of dead grass, roots, and organic matter. It sits between the soil and the grass blades. Use a small shovel or spade to dig a few small sections of your lawn. Measure the thickness of the thatch layer.
If the thatch layer is more than 1/2 inch thick, it’s time to dethatch. Thicker thatch can prevent water, air, and nutrients from reaching the soil. This leads to poor grass health. If the thatch is less than 1/2 inch, dethatching may not be necessary.
Pre-dethatching Lawn Care
Proper pre-dethatching care is essential. Follow these steps to prepare your lawn:
- Water the lawn: Water your lawn a day or two before dethatching. This makes the soil soft and easy to work with.
- Mow the grass: Mow your lawn to half its usual height. Shorter grass makes dethatching easier and more effective.
- Remove debris: Clear your lawn of leaves, sticks, and other debris. This prevents the mower attachment from getting clogged.
Preparing your lawn properly ensures better dethatching results. Follow these simple steps to maintain a healthy lawn.
Setting Up Your Mower Attachment
Setting up your mower attachment is a key step in dethatching your lawn. A well-adjusted mower attachment ensures effective and efficient dethatching. Follow these steps to get your equipment ready for the task.
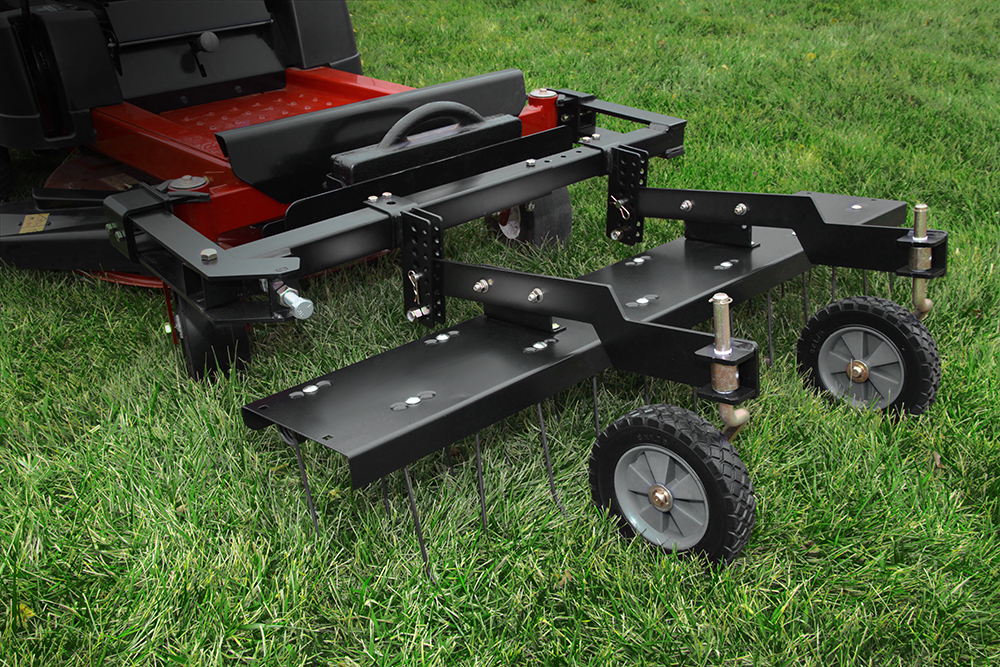
Attaching The Dethatcher
First, you need to attach the dethatcher to your mower. Place the dethatcher behind your mower. Align the attachment points with the corresponding slots on the mower.
Next, secure the attachment. Use the bolts and nuts provided. Tighten them firmly to ensure the dethatcher stays in place during use.
Refer to the manufacturer’s manual for specific instructions. Each model may have slight variations in the attachment process. Ensuring a proper fit is crucial for the best performance.
Adjusting The Settings
Once the dethatcher is attached, it’s time to adjust the settings. Adjusting the settings ensures the tines reach the right depth to remove thatch effectively.
First, set the tine depth. Use the adjustment lever or knob. Refer to your lawn’s thatch thickness to decide the depth. For light thatch, a shallow setting is best. For thicker thatch, a deeper setting may be needed.
Next, adjust the tine spacing. This determines how close the tines are to each other. Closer tines can remove more thatch in one pass. However, they may also be more aggressive on your lawn.
Check the height of your mower deck. Ensure it is set to a level that allows the dethatcher to work efficiently without damaging the grass.
Finally, perform a test run. Push the mower a short distance. Observe how the dethatcher engages with the lawn. Make any necessary adjustments to the tine depth and spacing for optimal performance.
| Step | Action | Notes |
|---|---|---|
| 1 | Attach Dethatcher | Align and secure with bolts |
| 2 | Set Tine Depth | Adjust based on thatch thickness |
| 3 | Adjust Tine Spacing | Closer for more aggressive dethatching |
| 4 | Check Mower Deck Height | Ensure it allows efficient dethatching |
| 5 | Perform Test Run | Observe and adjust as needed |
With these steps, your mower attachment will be set up correctly. This ensures efficient and effective dethatching. Now, you’re ready to move on to dethatching your lawn.
Dethatching Techniques
Proper dethatching techniques are crucial for maintaining a healthy lawn. Dethatching removes the layer of dead grass and roots that can choke your lawn. Using a mower attachment for dethatching can make the process more efficient. Let’s explore some effective techniques.
Mowing Pattern
Start by mowing the lawn in a regular pattern. This helps to evenly dethatch the entire area. Alternate the direction of your mowing pattern. For example, mow north-south first, then east-west. This crisscross pattern ensures thorough dethatching.
Optimal Dethatching Speed
Maintaining the correct speed is key for effective dethatching. Go too fast and you might miss some thatch. Too slow, and you risk damaging the grass. A steady, moderate pace works best. Keep an eye on the mower attachment to ensure it is pulling up the thatch properly.

Post-dethatching Lawn Care
After dethatching your lawn, it’s crucial to care for it properly. This ensures your lawn recovers quickly and thrives. Proper post-dethatching lawn care involves a few key steps. Let’s break it down into manageable tasks.
Removing Thatch Debris
Once you have dethatched your lawn, you will notice a lot of debris. This includes dead grass, roots, and other organic matter. Removing this debris is essential for your lawn’s health.
Follow these steps to clear the debris:
- Use a rake to gather the thatch into piles.
- Bag the piles and dispose of them properly.
- If you have a compost bin, you can add the debris there.
Clearing the debris helps the lawn breathe and absorb nutrients better.
Watering And Fertilizing
After removing the debris, your lawn needs water and nutrients. Watering helps the soil settle and the grass recover.
Follow these watering tips:
- Water your lawn deeply but infrequently.
- Ensure the soil is moist but not waterlogged.
- Water in the early morning to reduce evaporation.
Fertilizing provides the necessary nutrients for new growth. Choose a fertilizer that suits your lawn type.
| Fertilizer Type | Benefits |
|---|---|
| Nitrogen-rich | Promotes green, lush growth. |
| Phosphorus-rich | Encourages strong root development. |
| Potassium-rich | Improves disease resistance. |
Apply fertilizer evenly and water it in to help it absorb.
Common Mistakes To Avoid
Dethatching a lawn with a mower attachment can be tricky. Avoid mowing too low and damaging healthy grass. Ensure the blades are sharp to prevent tearing the turf.
Dethatching your lawn can improve its health. But, it’s easy to make mistakes. Mistakes can harm your grass instead of helping it. Let’s look at some common errors people make. Understanding these will help you avoid them.Over-dethatching
Many people over-dethatch their lawns. This can stress your grass. Over-dethatching removes too much thatch and healthy grass roots. Your lawn needs some thatch for protection. Too much removal can lead to bare patches. These patches can invite weeds.Ignoring Weather Conditions
Weather is important when dethatching. Wet soil can get damaged easily. Dry soil can be too hard. The best time is when the soil is moist, but not wet. Also, avoid very hot or very cold weather. Extreme temperatures can stress your lawn. Plan your dethatching for mild weather conditions. “`Seasonal Dethatching Tips
Dethatching your lawn at the right time makes a huge difference. It’s essential to know the best practices for each season. This section provides tips to ensure your lawn stays healthy throughout the year.
Best Time Of Year
The best time to dethatch your lawn is in the early spring or early fall. These seasons are ideal because the grass is actively growing. Avoid the hot summer months. High temperatures can stress the grass.
In early spring, the grass begins to wake up from winter dormancy. Dethatching at this time helps the grass grow strong. Early fall is also good. The cool weather supports recovery and growth before winter.
Frequency Of Dethatching
Dethatching frequency depends on the type of grass and lawn conditions. Most lawns need dethatching once a year. Some lawns may need it every two years. Check the thatch layer regularly. If it’s over half an inch thick, it’s time to dethatch.
For heavy-use lawns, consider more frequent dethatching. High foot traffic can cause thatch to build up faster. Monitor your lawn’s health to determine the best schedule.
Frequently Asked Questions
What Is A Dethatching Mower Attachment?
A dethatching mower attachment is a tool used to remove thatch. It attaches to a lawn mower, making the process efficient.
How Do You Dethatch A Lawn?
To dethatch a lawn, attach the dethatcher to your mower. Then, mow the lawn as usual, which removes the thatch.
When Should I Dethatch My Lawn?
You should dethatch your lawn in early spring or early fall. This timing promotes healthy grass recovery.
Why Is Dethatching Important For Lawns?
Dethatching is important because it removes dead grass and debris. This allows air, water, and nutrients to reach the soil.
Conclusion
Dethatching your lawn with a mower attachment is simple and effective. This method saves time and effort. Regular dethatching promotes healthy grass growth. Your lawn will look vibrant and well-maintained. Follow the steps carefully for the best results. Keep your mower in good condition.
Consistent lawn care ensures long-term benefits. Enjoy a lush, green lawn with ease. Happy gardening!
