
A clean carburetor is vital for a lawn mower’s performance. It ensures smooth operation and extends the mower’s life.
Cleaning a lawn mower carburetor might seem daunting, but it’s a simple task. With a few tools and some patience, you can do it yourself. A dirty carburetor can cause starting issues, rough idling, or stalling. Regular cleaning keeps your mower running efficiently.
In this guide, you will learn the steps to clean your lawn mower carburetor. No need for professional help—just follow the instructions. Save money and keep your lawn looking great. Let’s get started on making your mower run like new!
Preparation
Cleaning your lawn mower carburetor ensures it runs smoothly. Before you start, proper preparation is key. This involves taking safety precautions and gathering all the necessary tools.
Safety Precautions
- Turn off the lawn mower and disconnect the spark plug to avoid accidental starts.
- Wear protective gloves to keep your hands safe from chemicals and sharp parts.
- Work in a well-ventilated area to avoid inhaling fumes from the carburetor cleaner.
Gathering Necessary Tools
Having the right tools makes the job easier. Here is a list of what you’ll need:
- Screwdrivers: Both flathead and Phillips are essential.
- Socket Wrench Set: Useful for removing bolts and screws.
- Carburetor Cleaner: A must-have for cleaning the carburetor.
- Clean Cloths: For wiping and cleaning parts.
- Small Brush: Helps in scrubbing off dirt and grime.
Place all the tools within easy reach. This saves time and keeps you organized. Being prepared ensures a smooth and efficient cleaning process.
Removing The Carburetor
Removing the carburetor from your lawn mower might seem daunting. But with a few simple steps, you can do it yourself. This guide will walk you through the process. Let’s get started.
Locating The Carburetor
First, locate the carburetor. It’s usually on the side or top of the engine. Look for a metal or plastic piece attached to the engine. The carburetor connects to the air filter and fuel lines.
Detaching Fuel Lines
Next, detach the fuel lines. Use pliers to remove the clamps holding the fuel lines. Be careful, as fuel may spill out. Have a container ready to catch any fuel. Once the clamps are off, gently pull the fuel lines away from the carburetor.
Now, you are ready to remove the carburetor from the engine. Loosen the bolts or screws holding it in place. Keep these screws safe for reassembly. Gently pull the carburetor away from the engine.
Disassembling The Carburetor
Cleaning your lawn mower carburetor starts with taking it apart. This might sound complex, but with the right steps, it’s straightforward. Disassembling the carburetor allows you to clean each part thoroughly. Let’s break this process into simple steps.
Removing The Float Bowl
The float bowl holds fuel and is usually at the bottom of the carburetor. To remove it, you’ll need a wrench or a screwdriver. First, find the bolt that holds the bowl. This is usually in the center. Turn the bolt counterclockwise to loosen it.
Once the bolt is loose, carefully remove it. Be ready for some fuel to spill. Hold a small container under the bowl to catch the fuel. After the bolt is out, gently pull the bowl down. You will see the float mechanism inside.
Inspecting Components
With the float bowl off, you can see the internal parts. Check the float for any damage or wear. The float should move freely without sticking. Also, inspect the needle valve. It works with the float to control fuel flow.
Next, look at the jets. These are small openings that fuel passes through. If they are clogged, your mower will run poorly. Use a thin wire to clear any debris in the jets. Be careful not to enlarge the openings.
Finally, check the gaskets and seals. They should be intact and flexible. If you see cracks or breaks, replace them. Replacing worn parts ensures a good seal and proper function.

Cleaning The Carburetor
Cleaning your lawn mower’s carburetor is essential for smooth operation. A dirty carburetor can cause your mower to stall or run poorly. Regular cleaning can prevent these issues. Follow these steps to clean the carburetor effectively.
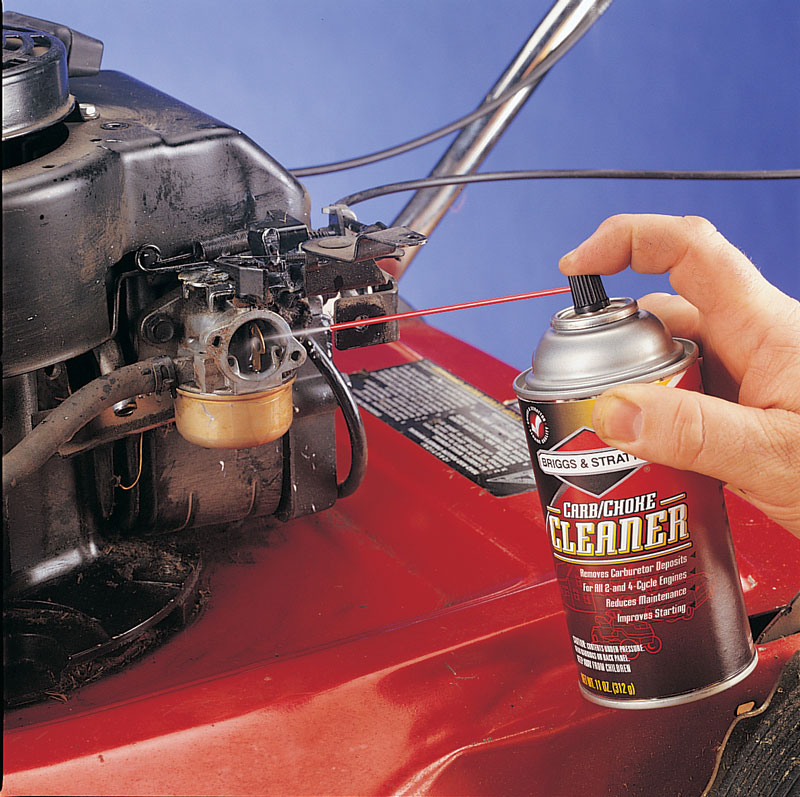
Using Carburetor Cleaner
First, purchase a quality carburetor cleaner from a hardware store. Remove the air filter to access the carburetor. Spray the cleaner on the exterior to remove dirt and grime. Ensure you spray all visible parts. Let it sit for a few minutes to break down residue.
Next, remove the carburetor bowl. This is usually secured with a nut or screw. Spray carburetor cleaner inside the bowl and on the float. Wipe them clean with a cloth. Reassemble the bowl once cleaned.
Cleaning Jets And Passages
The jets and passages inside the carburetor are crucial. These parts can get clogged easily. Remove the jets using a screwdriver. Spray cleaner through the jets to clear any blockages. Use a thin wire to poke through and ensure they are clear.
Next, spray carburetor cleaner into all passages and openings. Allow the cleaner to work for a few minutes. Use compressed air to blow through the passages. This ensures no residue remains. Reinstall the jets carefully. Ensure they fit snugly.
Finally, reattach the carburetor to the mower. Secure all screws and nuts. Start the mower to check if it runs smoothly. A clean carburetor should improve performance immediately.
Reassembling The Carburetor
Reassembling the carburetor is a crucial step in maintaining your lawn mower. It ensures your machine runs smoothly and efficiently. Taking care during this process can prevent future issues and prolong the life of your mower.
Reinstalling The Float Bowl
Begin with the float bowl. This part holds the fuel for the carburetor. Attach it back to the main body carefully. Use the screws you removed earlier. Tighten them securely but avoid over-tightening.
Check for any signs of wear or damage. Replace any faulty parts. This helps prevent leaks and ensures smooth operation.
Ensuring Proper Alignment
Proper alignment is essential for a functional carburetor. Make sure all parts fit together snugly. Align the gasket and the float bowl perfectly. Misalignment can cause fuel leaks and poor performance.
Double-check the position of the float and needle. They must move freely and not stick. This ensures that fuel flows correctly.
Reinstalling The Carburetor
Reinstalling the carburetor is an important step in ensuring your lawn mower runs smoothly. Once you have cleaned and inspected the carburetor, it’s time to put it back in place. This process involves attaching the fuel lines and securing the carburetor properly. Follow these steps to make sure your lawn mower is ready to go.
Attaching Fuel Lines
First, locate the fuel lines. These are usually rubber tubes connecting the fuel tank to the carburetor. Carefully reattach the fuel lines to the carburetor. Make sure the connections are tight and secure.
- Inspect the fuel lines for any cracks or damage.
- Slide the fuel line onto the carburetor nozzle.
- Use a small clamp to secure the fuel line in place.
Check for any leaks. If there are any, adjust the connections until they are leak-free.
Securing The Carburetor
With the fuel lines attached, it’s time to secure the carburetor to the engine. Position the carburetor on the mounting studs. Use the bolts or screws that you removed earlier to secure it.
- Align the carburetor with the mounting holes.
- Insert the bolts or screws into the holes.
- Tighten the bolts evenly to avoid damaging the carburetor.
Ensure the carburetor is firmly attached. It should not move or wobble when you touch it.
Once the carburetor is secure, reconnect the throttle linkage. This allows you to control the engine speed using the throttle lever. Make sure the linkage moves freely and is not obstructed.
By following these steps, you have successfully reinstalled the carburetor. Your lawn mower should now be ready for use. Regular maintenance, including cleaning the carburetor, will help keep your lawn mower running smoothly.
Testing The Lawn Mower
After cleaning your lawn mower carburetor, it’s time to test the machine. This ensures everything is working correctly. Proper testing will help identify any remaining issues. Follow these steps for effective testing.
Starting The Engine
First, ensure you have enough fuel in the tank. Check the oil levels as well. Place the mower on a flat surface.
- Set the throttle to the choke position.
- Pull the starter rope firmly.
- Listen to the engine as it starts.
If the engine starts smoothly, proceed to the next step. If not, double-check your carburetor cleaning.
Checking For Smooth Operation
Let the engine run for a few minutes. This allows you to observe its performance. Pay attention to the following:
- Consistency in engine sound
- No unusual noises or vibrations
- Stable idling without stalling
Run the mower over a small patch of grass. Ensure the blades are cutting evenly. Check for any signs of sputtering or power loss.
If the engine operates smoothly, your cleaning was successful. If you notice problems, consider rechecking the carburetor. Inspect for any missed debris or incorrect reassembly.
Maintenance Tips
Maintaining your lawn mower carburetor keeps your machine running smoothly. Regular care prevents issues and extends the mower’s life. Follow these tips to ensure your carburetor stays clean and efficient.
Regular Cleaning Schedule
Establishing a regular cleaning schedule is vital. Aim to clean your carburetor at least once a month during mowing season. This keeps debris and dirt from clogging the system.
- Weekly Check: Inspect the carburetor for visible dirt and grime.
- Monthly Clean: Use a carburetor cleaner to remove buildup.
- Seasonal Maintenance: Deep clean before and after the mowing season.
Regular cleaning ensures your lawn mower performs at its best. It also prevents costly repairs.
Storing Your Lawn Mower
Proper storage of your lawn mower is essential. Before storing, clean the carburetor thoroughly. This prevents fuel residue from hardening and clogging the system.
- Drain the Fuel: Run the mower until the fuel tank is empty.
- Clean the Carburetor: Use a cleaner to remove any residue.
- Store in a Dry Place: Keep the mower in a dry, sheltered area.
Proper storage keeps your carburetor clean and ready for the next mowing season.
| Task | Frequency |
|---|---|
| Inspect Carburetor | Weekly |
| Clean Carburetor | Monthly |
| Deep Clean | Seasonal |
Following these maintenance tips ensures your lawn mower carburetor stays in top shape. Regular cleaning and proper storage go a long way in maintaining your mower’s performance.

Frequently Asked Questions
How Often Should I Clean My Lawn Mower Carburetor?
You should clean your lawn mower carburetor at least once a season. Regular cleaning helps maintain performance and prevents issues.
What Tools Do I Need To Clean A Carburetor?
You will need a screwdriver, carburetor cleaner, a brush, and gloves. Having these tools will make the cleaning process easier and more efficient.
Can A Dirty Carburetor Affect Lawn Mower Performance?
Yes, a dirty carburetor can cause poor engine performance. It can lead to hard starts, stalling, and reduced power.
How Do I Know If My Carburetor Needs Cleaning?
Signs your carburetor needs cleaning include difficulty starting, rough idling, and decreased fuel efficiency. Regular inspection can help identify these issues early.
Conclusion
Cleaning a lawn mower carburetor is essential for smooth performance. Regular maintenance prevents engine problems and saves you money. Follow the steps in this guide to keep your mower in top shape. Take safety precautions and use the right tools.
Clean parts thoroughly and reassemble carefully. Your lawn mower will run efficiently, giving you a beautiful lawn. Remember, a clean carburetor means less frustration and more time enjoying your yard. Happy mowing!
