Cleaning a Honda lawn mower carburetor isn’t hard. It just needs the right steps.
Maintaining your lawn mower is essential for its long life. The carburetor plays a vital role in the mower’s performance. Over time, dirt and debris can clog it, causing issues. Knowing how to clean the carburetor will save you time and money.
You don’t need to be a mechanic to do this. With some basic tools and a bit of patience, you can get your mower running smoothly again. This guide will help you understand the process. It will make your lawn mower work like new. Let’s dive into the steps to clean a Honda lawn mower carburetor.
Preparing For The Cleaning
Cleaning the carburetor of your Honda lawn mower ensures it runs smoothly. Before you begin, it’s essential to prepare properly. This will make the cleaning process easier and safer. Follow these steps carefully to avoid any issues.
Safety Precautions
Always prioritize safety when working on your lawn mower. Wear protective gloves to keep your hands safe from dirt and chemicals. Safety goggles are also essential to protect your eyes from debris. Work in a well-ventilated area to avoid inhaling harmful fumes.
Disconnecting The Spark Plug
Disconnecting the spark plug is vital to prevent accidental starts. Locate the spark plug wire and gently pull it off the plug. This ensures that the engine won’t start while you’re working. It’s a simple step but very important for your safety.
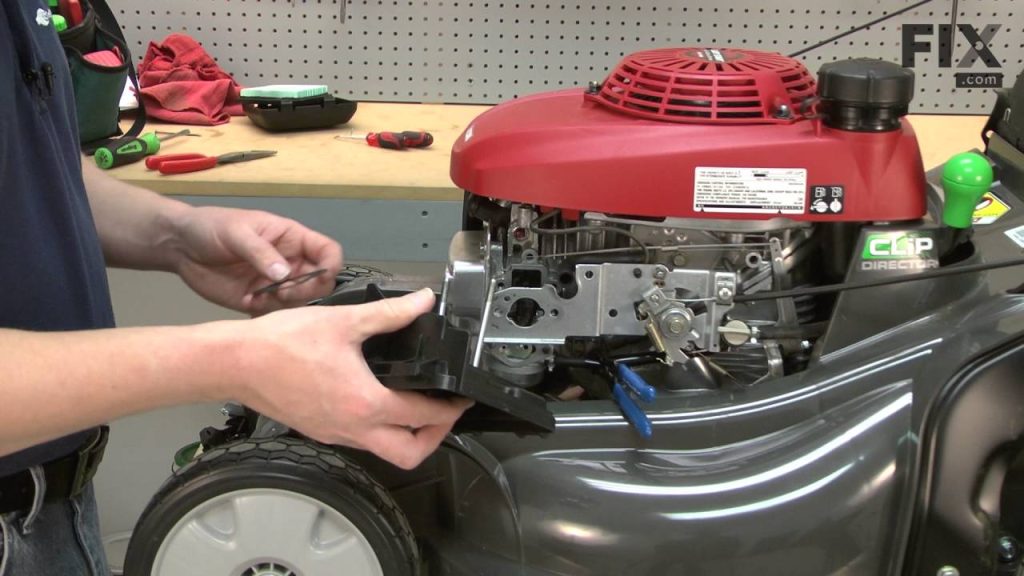
Accessing The Carburetor
Maintaining a Honda lawn mower requires regular cleaning of the carburetor. This ensures optimal performance and extends the mower’s lifespan. The first step in this process is accessing the carburetor. This involves removing the air filter and detaching the carburetor itself.
Removing The Air Filter
The air filter is located on the side of the engine. Begin by locating the air filter cover, usually held in place by screws or clips.
- Use a screwdriver to remove the screws or unclip the cover.
- Carefully take off the cover and set it aside.
- Remove the air filter from its housing. Inspect it for dirt or damage.
Cleaning or replacing the air filter is crucial. A dirty filter can affect the carburetor’s function.
Detaching The Carburetor
After removing the air filter, the carburetor is more accessible. Follow these steps to detach it:
- Locate the bolts securing the carburetor to the engine.
- Use a wrench to loosen and remove these bolts.
- Carefully pull the carburetor away from the engine.
Be mindful of the gaskets and linkage connections. They are vital for reassembling the carburetor correctly.
Place the carburetor on a clean surface. This prevents dirt from entering the system.
With the carburetor detached, you can now proceed to clean it thoroughly. Proper cleaning ensures your Honda lawn mower runs smoothly.
Disassembling The Carburetor
Cleaning a Honda lawn mower carburetor is essential for maintaining its performance. The first step is disassembling the carburetor. This process involves identifying and separating each part for thorough cleaning. Follow these steps to ensure you do it correctly.
Identifying Carburetor Parts
Before you begin, identify the parts of your carburetor. This helps in reassembling it later. Here is a simple table to help you:
| Part | Description |
|---|---|
| Float | Regulates fuel level |
| Needle valve | Controls fuel flow |
| Jets | Sprays fuel into the engine |
| Gaskets | Seals different parts |
Taking Apart The Carburetor
Once you have identified the parts, proceed to take apart the carburetor. Follow these steps:
- Turn off the fuel valve and disconnect the spark plug wire.
- Remove the air filter cover and the air filter.
- Unbolt the carburetor from the engine using a wrench.
- Disconnect the throttle and choke cables carefully.
- Use a screwdriver to remove the float bowl.
- Take out the float and needle valve gently.
- Remove the jets using a small screwdriver.
- Inspect gaskets for wear and replace if needed.
Make sure to keep track of all parts as you disassemble. This ensures easy reassembly later. Cleaning each part thoroughly is crucial for optimal performance.

Cleaning The Carburetor
Cleaning the carburetor of your Honda lawn mower is essential for its performance. A clean carburetor ensures your mower runs smoothly. It also prevents many common engine problems. Follow these steps to clean your carburetor effectively.
Using Carburetor Cleaner
Begin by using a carburetor cleaner. This is a special spray that removes dirt and buildup. First, remove the air filter cover and the air filter. Then, locate the carburetor. Spray the cleaner into the carburetor throat. Let it sit for a few minutes. This will loosen the dirt and debris.
Next, use a soft brush to scrub the carburetor’s exterior. This will help remove any stubborn dirt. Wipe the area with a clean cloth. Repeat the spraying and brushing if necessary. Ensure all parts are clean before moving to the next step.
Cleaning Small Parts
Cleaning small parts is also crucial. Disassemble the carburetor carefully. Place the small parts on a clean cloth. Use the carburetor cleaner to spray each part. Pay attention to the jets and screws.
Here is a simple table to help you keep track of the parts:
| Part | Cleaning Method |
|---|---|
| Jets | Spray with cleaner, use a fine wire to clear any blockages |
| Screws | Spray with cleaner, wipe with a clean cloth |
| Needles | Spray with cleaner, brush gently |
Once the parts are clean, reassemble the carburetor. Make sure all parts are dry before reassembling. A clean carburetor leads to a better performing lawn mower.
Reassembling The Carburetor
Cleaning a Honda lawn mower carburetor involves careful reassembly. Ensure each part is correctly placed for optimal performance. Pay attention to small components to avoid future issues.
Reassembling the carburetor is a crucial step in ensuring your Honda lawn mower runs smoothly. After cleaning, putting the parts back together correctly is essential. Follow these steps to reassemble your carburetor efficiently.Reattaching Carburetor Parts
Start by gathering all the parts. Ensure they are clean and dry. Begin with the float and needle. Attach them carefully to the carburetor body. Next, reattach the float bowl. Secure it with the screws you removed earlier. Make sure to tighten them properly. Then, reattach the main jet. Ensure it is firmly in place. Finally, reattach the gasket. Position it correctly to prevent leaks.Ensuring Proper Assembly
Double-check each part to ensure they are correctly assembled. Verify the float moves freely. Make sure the needle is properly seated. Check all screws are tight but not over-tightened. Reattach the carburetor to the lawn mower. Connect the fuel line and throttle linkages. Ensure everything is securely connected. Test the mower to see if it starts smoothly. If it runs without issues, you have successfully reassembled the carburetor. “`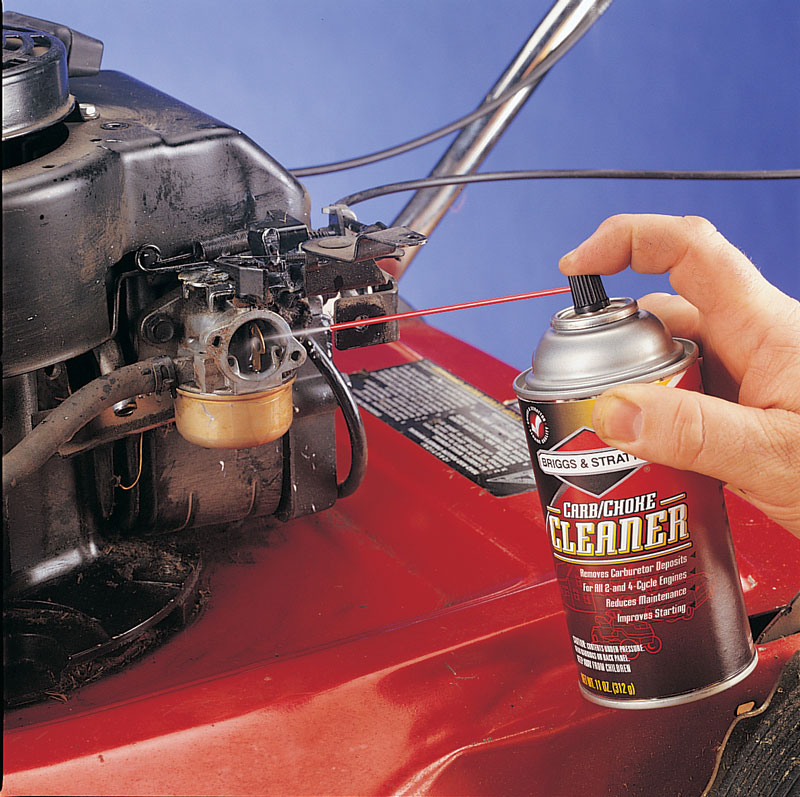
Reinstalling The Carburetor
After cleaning your Honda lawn mower carburetor, it’s time to put it back. This step is crucial for your lawn mower to run smoothly. Follow these simple steps to ensure everything fits correctly.
Reconnecting The Carburetor
First, align the carburetor with the mounting bolts. Slide it gently into place. Next, reattach the fuel line. Ensure the clamp is tight to avoid leaks. Then, reconnect the throttle linkage. This piece controls the engine speed. Be careful not to bend or twist it.
| Step | Description |
|---|---|
| 1 | Align the carburetor with mounting bolts |
| 2 | Slide carburetor into place |
| 3 | Reattach the fuel line |
| 4 | Reconnect the throttle linkage |
Make sure everything is secure. Check for any loose connections. A loose connection can affect performance.
Securing The Air Filter
Once the carburetor is in place, it’s time to secure the air filter. First, align the air filter housing with the carburetor. Insert the screws and tighten them. Next, place the air filter into the housing. Make sure it sits properly.
- Align the air filter housing
- Insert and tighten screws
- Place the air filter into housing
- Ensure a proper fit
The air filter keeps dirt out of the engine. A clean filter helps your mower run better. Double-check the filter for any gaps. Gaps can let dirt enter the engine.
With the carburetor and air filter in place, your Honda lawn mower should be ready. Reinstall the carburetor carefully to avoid issues. Regular maintenance keeps your mower in top shape. Happy mowing!
Testing And Final Checks
After cleaning your Honda lawn mower carburetor, it’s crucial to perform testing and final checks. This ensures the carburetor works properly and your mower runs smoothly. Follow these steps for a thorough check.
Reconnecting The Spark Plug
First, reconnect the spark plug. Ensure it fits snugly and is secure. A loose spark plug can cause starting issues.
- Locate the spark plug connector.
- Push the connector onto the spark plug firmly.
- Check for any loose connections.
Make sure the spark plug wire is not damaged. Replace it if necessary.
Starting The Mower
Now, start the mower to test the carburetor. Follow these steps:
- Move the mower to an open area.
- Set the throttle to the start position.
- Pull the starter cord firmly.
Listen to the engine. It should start easily and run smoothly. If it sputters or stalls, recheck the carburetor connections.
Observe the mower while running. Look for any fuel leaks or unusual noises.
Final checks:
- Inspect the air filter for cleanliness.
- Ensure the fuel line is not clogged.
- Check the carburetor for any leaks.
Perform these steps carefully. Your Honda lawn mower should run efficiently after a thorough clean.

Maintenance Tips
Maintaining your Honda lawn mower carburetor is crucial for its performance. Regular cleaning helps prevent problems. It ensures your mower runs smoothly. Here are some essential maintenance tips.
Regular Cleaning Schedule
Create a routine for cleaning your carburetor. Clean it every 25 hours of use. This keeps debris from building up. Follow the manufacturer’s instructions. Make sure to use proper cleaning tools.
Troubleshooting Common Issues
Identify common carburetor problems. Look for signs like rough idling. Check for poor fuel efficiency. These can indicate a dirty carburetor. Regular inspections help spot these issues early.
Use a carburetor cleaner. Spray it into the carburetor to remove grime. Replace any damaged parts immediately. This ensures your lawn mower stays in top condition.
Frequently Asked Questions
Can You Clean A Lawn Mower Carburetor Without Removing It?
Yes, you can clean a lawn mower carburetor without removing it. Use a carburetor cleaner spray. Spray directly into the carburetor throat to dissolve deposits. Ensure the engine is off before starting. Regular maintenance helps keep it clean.
Can You Spray Carb Cleaner Directly Into Carb Lawn Mower?
Yes, you can spray carb cleaner directly into the carburetor of a lawn mower. Ensure the engine is off.
How Do I Know If My Lawn Mower Carburetor Is Clogged?
Your lawn mower may have a clogged carburetor if it stalls, struggles to start, or runs unevenly.
How Do You Clean A Gummed Up Carburetor On A Lawn Mower?
To clean a gummed-up carburetor, remove it, disassemble, soak parts in carburetor cleaner, scrub with a brush, rinse, and reassemble.
Conclusion
Cleaning your Honda lawn mower carburetor isn’t too difficult. Follow the steps carefully. Ensure all parts are clean and reassembled correctly. Regular maintenance helps your mower run smoothly. A clean carburetor improves performance and longevity. Always consult your manual for specific instructions.
With these tips, your lawn mower will stay in top shape. Happy mowing!
