
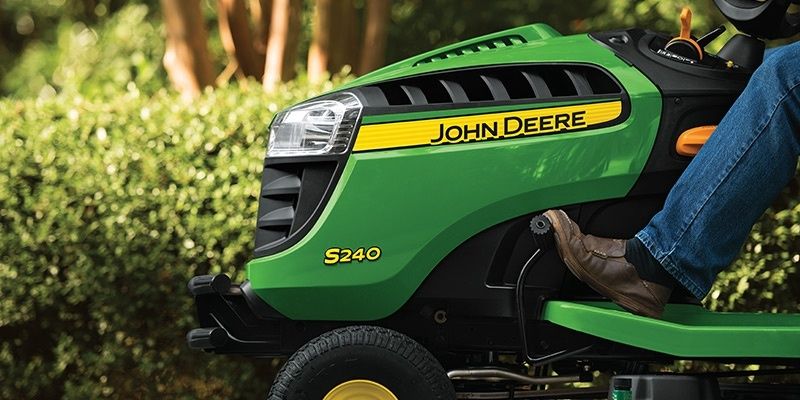
Winterizing your riding lawn mower is essential to keep it in good shape. It prevents issues when spring arrives.
As the cold months approach, your riding lawn mower needs care. Proper winterization ensures it starts up easily when the snow melts. This process involves a few crucial steps. It helps in avoiding damage caused by freezing temperatures. Neglecting these steps can lead to costly repairs.
So, taking the time now saves you trouble later. In this guide, we will explain how to winterize your riding lawn mower. You’ll learn simple, effective methods to prepare your machine for winter. This will ensure it remains in top condition and ready for use when the grass starts growing again.
Preparing Your Workspace
Winterizing your riding lawn mower is essential. A well-prepared workspace makes the process easier and safer. You need to ensure you have the right tools and adequate lighting. This will help you focus on the task and avoid mistakes.
Gather Necessary Tools
Before you start, gather all the necessary tools. This will save you time and frustration. Here is a list of tools you might need:
- Wrenches and sockets
- Screwdrivers (Phillips and flathead)
- Oil drain pan
- Fuel stabilizer
- Cleaning supplies (soap, water, rags)
- New oil and oil filter
- New air filter
- Battery charger
- Protective gloves
- Safety glasses
Having these tools ready will make the winterizing process smoother. Place them in a convenient location, so you can easily reach them.
Ensure Adequate Lighting
Good lighting is crucial. It helps you see what you’re doing and prevents accidents. Here are some tips for ensuring adequate lighting:
- Use a bright overhead light.
- Add a portable work light for extra visibility.
- Ensure windows are clean to let in natural light.
- Check that all bulbs are working properly.
Proper lighting ensures you don’t miss important steps. It also helps you spot any issues with your mower.
Now that your workspace is ready, you can start winterizing your riding lawn mower with confidence. A well-prepared workspace means a safer, more efficient process.
Cleaning The Mower
Winterizing your riding lawn mower starts with a thorough cleaning. This step prevents rust and keeps your mower in good condition. A clean mower works better and lasts longer. Let’s break down the cleaning process into two parts.
Remove Grass Clippings
First, remove any grass clippings from the mower. Grass clippings can cause rust and damage. Follow these steps:
- Wear gloves to protect your hands.
- Use a brush to remove loose clippings.
- Check the mower deck and blades for stuck grass.
- Use a putty knife to scrape off any remaining clippings.
Make sure to get all the grass out. This will help your mower stay clean and work well next season.
Wash And Dry The Exterior
Next, wash the exterior of the mower. Use a garden hose to rinse off dirt and debris. Follow these steps:
- Fill a bucket with warm, soapy water.
- Dip a sponge into the soapy water.
- Scrub the mower’s exterior gently.
- Rinse with the garden hose.
- Dry the mower with a clean towel.
Drying the mower is important to prevent rust. Make sure the mower is completely dry before storing it for winter.
Inspecting The Mower
Before storing your riding lawn mower for winter, inspect it thoroughly. This step ensures it remains in good condition for the next mowing season. A detailed inspection can prevent costly repairs and extend the mower’s lifespan.
Check For Damage
First, examine the entire mower for visible damage. Look for cracks, dents, or rust on the body. Check the tires for wear and tear. Ensure the seat is secure and free from tears. Address any issues you find immediately.
Inspect Blades And Belts
Next, inspect the mower blades. Look for nicks, dullness, or bends. Sharp blades provide a clean cut and reduce strain on the engine. Replace or sharpen dull blades.
Then, check the belts. Inspect for signs of wear, fraying, or cracks. Worn belts can break, causing operational issues. Replace any damaged belts to ensure smooth operation.

Changing The Oil
Winterizing your riding lawn mower is crucial for its longevity. One of the most important steps is changing the oil. Old oil can cause engine damage when your mower sits idle during winter. Here’s a step-by-step guide to help you through the process.
Drain Old Oil
First, ensure the engine is warm but not hot. This helps the oil flow out easily. Turn off the engine and remove the key. Place an oil pan under the mower to catch the old oil.
- Locate the oil drain plug, usually at the bottom of the engine.
- Use a wrench to loosen the plug.
- Let the oil drain completely into the pan.
- After the oil has drained, replace the drain plug securely.
Refill With Fresh Oil
Now it’s time to add fresh oil. Check your mower’s manual for the recommended oil type. Typically, SAE 30 is used for warm climates and SAE 10W-30 for colder areas.
- Remove the oil cap on top of the engine.
- Use a funnel to pour the new oil into the engine.
- Fill the oil slowly to avoid overfilling.
- Check the oil level with the dipstick.
- Replace the oil cap once the oil level is correct.
Changing the oil helps keep your engine in good shape. It ensures your mower runs smoothly when you start using it again.
Stabilizing Fuel
Stabilizing the fuel in your riding lawn mower is crucial for winterization. Fuel can degrade over time. This can cause engine problems when you start it in the spring. Follow these steps to keep your mower’s fuel system in good condition.
Add Fuel Stabilizer
First, purchase a quality fuel stabilizer. These additives prevent fuel breakdown. Read the product instructions. Measure the right amount of stabilizer for your fuel tank size. Pour the stabilizer directly into the gas tank. This step is important. It keeps the fuel fresh for many months.
Run Engine To Circulate
After adding the stabilizer, start the lawn mower. Let the engine run for about 10 minutes. This helps distribute the stabilizer throughout the fuel system. The fuel lines, carburetor, and engine parts will be protected. Running the engine ensures the stabilizer mixes well with the fuel. Now your mower is ready to face the winter months.
Protecting The Battery
Winterizing your riding lawn mower includes protecting the battery. Proper care ensures your battery lasts longer and performs better when spring arrives. Follow these steps to protect your battery during the cold months.
Disconnect Battery
Start by turning off your lawn mower. Then, locate the battery and remove the negative cable first. This step prevents any accidental sparks. After that, remove the positive cable. Keep the cables away from the battery terminals.
Store In A Cool, Dry Place
Place the battery in a cool, dry place. Avoid areas with extreme temperatures. A basement or garage works well. Make sure the storage area is away from any flammable materials. This precaution keeps the battery safe and ready for use.
Lubricating Moving Parts
Winterizing your riding lawn mower is essential for its longevity. One key step is lubricating the moving parts. Proper lubrication keeps the machine running smoothly. It also prevents rust and wear during the cold months.
Apply Grease To Bearings
Bearings need regular greasing. Locate the bearings on your mower. Use a grease gun to apply the grease. Make sure to cover all the bearings. Grease helps reduce friction. It ensures smooth operation when you use the mower again.
Lubricate Cables And Pivots
Cables and pivots also need attention. Find the cables that control the mower’s functions. Apply a light oil to these cables. This prevents them from sticking. Pivots should be lubricated as well. Apply oil to all pivot points. This keeps them moving freely. Proper lubrication ensures your mower stays in top shape.
Storing The Mower
Winterizing a riding lawn mower involves proper storage. Storing the mower correctly will ensure it remains in good condition for the next season. This section will guide you on storing your mower safely.
Choose A Dry Location
Find a dry place for your mower. Moisture can cause rust and damage. A garage or shed works well. Ensure the location is free from leaks.
Keep the space clean and free from debris. This prevents rodents and pests from nesting in your mower. A dry and clean space is essential for winter storage.
Cover With A Protective Tarp
Once the mower is in a dry location, cover it with a tarp. The tarp protects the mower from dust and dirt. Make sure the tarp is breathable to prevent moisture buildup.
Secure the tarp with bungee cords or straps. This ensures the tarp stays in place. A well-covered mower will be ready for use in the spring.

Frequently Asked Questions
How Do I Winterize My Riding Lawn Mower?
To winterize your riding lawn mower, clean it thoroughly, change the oil, and add fuel stabilizer. Remove the battery and store it in a cool place. Sharpen the blades and check for any damaged parts.
Should I Drain The Fuel Before Winter Storage?
Yes, you should drain the fuel or add a fuel stabilizer. This prevents the fuel from degrading and clogging the carburetor during storage.
Do I Need To Change The Oil Before Storing?
Yes, changing the oil before winter storage is essential. Old oil can contain contaminants that may damage the engine over time.
How Should I Store The Battery?
Remove the battery and clean it. Store it in a cool, dry place. Ensure it’s fully charged and check it periodically.
Conclusion
Winterizing your riding lawn mower is crucial. It extends its lifespan. Proper maintenance prevents costly repairs. Clean the mower thoroughly. Drain and replace the oil. Remove and store the battery. Check the tires and inflate them. Store your mower in a dry place.
Cover it to protect against dust and moisture. These simple steps ensure your mower runs smoothly next season. Taking care of your mower now saves time later. Winterize today for a hassle-free spring.
