Cleaning a Honda lawn mower carburetor is vital for its performance. A dirty carburetor can cause many issues, including poor engine start and reduced efficiency.
In this guide, you will learn how to clean your Honda lawn mower carburetor easily. Regular maintenance ensures your mower runs smoothly and lasts longer. The carburetor mixes air and fuel, making it essential for engine function. Over time, dirt and debris can clog it, leading to problems.
Cleaning the carburetor may seem daunting, but with the right steps, it becomes simple. Follow along for a step-by-step approach to keep your mower in top condition. Stay tuned to enhance your lawn care experience.
Preparation
Preparing to clean your Honda lawn mower carburetor is crucial. Proper preparation ensures a smooth and successful cleaning process. Start by setting up a clean workspace. Make sure you have all the necessary tools and safety gear. This will save you time and prevent accidents.
Gather Tools
First, gather all the tools you need. You will need a screwdriver, wrench, and a clean cloth. Have a carburetor cleaner spray ready. A small brush and a bowl for parts are also helpful. Having everything ready will make the task easier.
Ensure Safety
Next, ensure your safety. Wear safety gloves to protect your hands. Safety goggles are also important to shield your eyes. Work in a well-ventilated area to avoid inhaling fumes. Make sure the lawn mower is off and cool before starting. Disconnect the spark plug to prevent any accidental starts. Safety should always be your first priority.

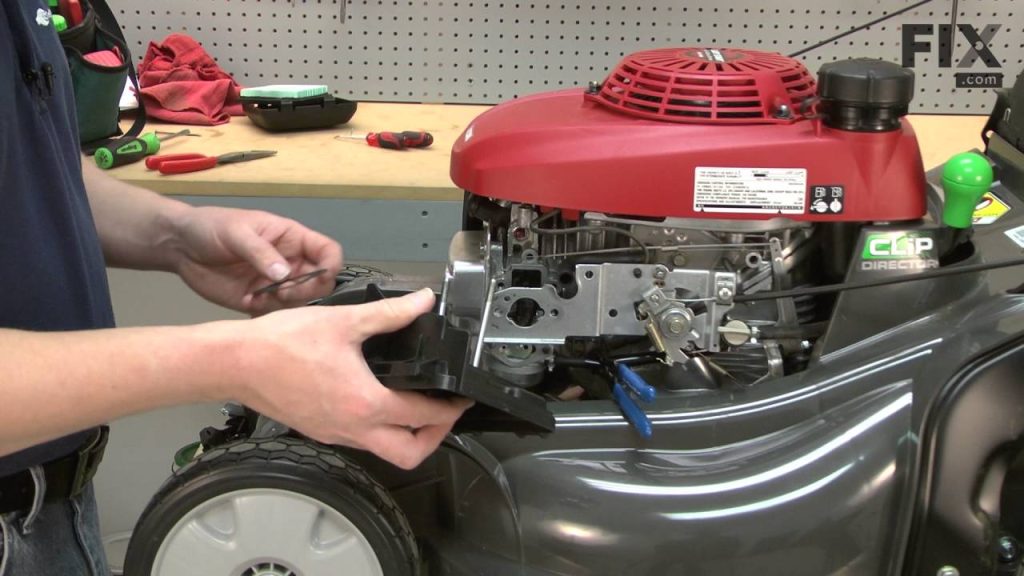
Accessing The Carburetor
Cleaning your Honda lawn mower carburetor is essential for smooth operation. First, you need to access the carburetor. This process involves a few simple steps. Follow the instructions below to get started.
Remove Air Filter
Begin by locating the air filter on your mower. It is usually on the side of the engine. Use a screwdriver to remove the screws holding the air filter cover. Take off the cover and set it aside. Carefully remove the air filter. Inspect it for any dirt or damage. Clean or replace it if necessary.
Detach Fuel Line
Next, find the fuel line connected to the carburetor. Use pliers to pinch the clip holding the fuel line. Slide the clip back and gently pull the fuel line off the carburetor. Be prepared for a small amount of fuel to spill. You can use a container to catch any fuel that leaks out.
Disassembling The Carburetor
Disassembling the carburetor is essential for a thorough clean. It involves removing and separating its parts. This section will guide you through the steps in a simple way. Follow these instructions carefully to avoid damaging any components.
Unscrew Carburetor
Start by unscrewing the carburetor from the engine. Use a wrench to remove the bolts holding it in place. Keep the bolts safe for reassembly. Once unscrewed, gently pull the carburetor away from the engine. Avoid using too much force to prevent damage.
Separate Parts
Next, separate the parts of the carburetor. Carefully remove the float bowl at the bottom. Use a screwdriver to unscrew the bowl. Inside, you will find a float and a needle valve. Note their positions for reassembly.
Remove the float and needle valve. Check for any dirt or debris. Clean these parts with a carburetor cleaner. Ensure all passages are clear. Also, inspect the gaskets for wear and tear. Replace any damaged gaskets to prevent leaks.
Cleaning The Carburetor
Cleaning the carburetor of your Honda lawn mower is essential for its performance. A clean carburetor ensures the engine runs smoothly. It also helps in maintaining fuel efficiency. This task is not as daunting as it seems. With the right steps, you can do it yourself. Let’s dive into the process of cleaning the carburetor.
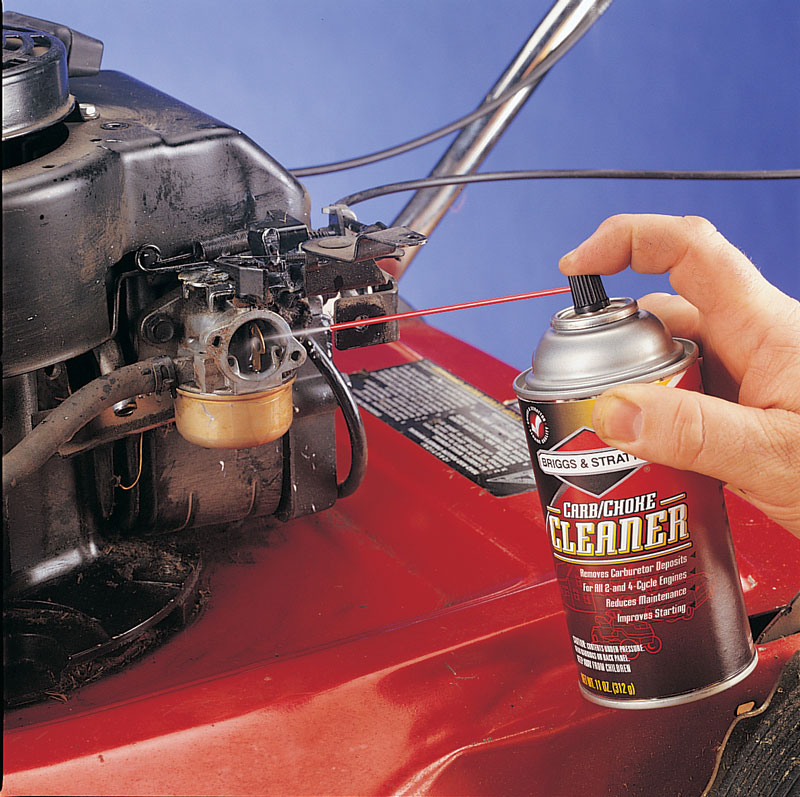
Spray Cleaner
First, you need a carburetor spray cleaner. This cleaner helps remove dirt and deposits. Spray it onto the carburetor parts. Ensure you cover all the small openings. Let the cleaner sit for a few minutes. It will dissolve the grime and dirt.
Brush Components
Next, use a small brush to clean the components. A toothbrush works well for this. Gently scrub the surfaces. Pay attention to the tiny parts and crevices. Remove all the loosened dirt. Brush thoroughly until the parts are clean.
Inspecting Components
Inspecting components of your Honda lawn mower carburetor is crucial. This ensures the machine runs smoothly. You need to check each part carefully. This will help identify any issues early. Let’s look at two key parts to inspect.
Check Jets
First, locate the jets in the carburetor. These small openings control fuel flow. Remove the jets gently. Hold them up to the light. Look through the holes to see if they are clear. If blocked, use a thin wire to clean them. Be careful not to damage the jets. Reinstall them once they are clean.
Inspect Gaskets
Next, inspect the gaskets. Gaskets seal different parts of the carburetor. Carefully remove the gaskets. Check for any wear or damage. Look for cracks or tears. If any gasket is damaged, replace it with a new one. Ensure the new gasket fits well. This prevents any air or fuel leaks. Proper gasket inspection keeps the carburetor functioning properly.
Reassembling The Carburetor
Reassembling your Honda lawn mower carburetor is essential for smooth operation. Follow these steps to ensure everything fits back together correctly.
Reattach Parts
Start by reattaching the float and needle. Place them back in their original positions. Ensure the float moves freely up and down. Next, reattach the gasket and the bowl. Align the gasket properly to prevent any leaks. Secure the bowl with the retaining screw. Tighten it firmly but do not over-tighten.
Screw Carburetor
Now, reattach the carburetor to the engine. Line it up with the mounting studs. Slide it into place gently. Screw the carburetor back onto the engine. Use the appropriate screws and tighten them securely. Ensure all connections are tight and there are no gaps. Double-check the fuel line and throttle linkages. Connect them back to the carburetor carefully. Make sure they move freely and are not kinked or pinched.
Reinstalling The Carburetor
Reinstalling the carburetor is a crucial step in maintaining your Honda lawn mower. Proper reinstallation ensures your mower runs smoothly. Follow these steps carefully to prevent any issues.
Reconnect Fuel Line
First, locate the fuel line. It connects the fuel tank to the carburetor. Slide the fuel line onto the carburetor’s inlet. Make sure it is snug and secure.
Use a clamp to hold the fuel line in place. Squeeze the clamp and slide it over the connection point. Release the clamp to secure the line. This will prevent fuel leaks.
Replace Air Filter
An air filter is crucial for keeping dirt out of the carburetor. Place the new air filter into its housing. Ensure it fits snugly.
Fasten the housing cover with screws. Tighten them, but do not over-tighten. Over-tightening can damage the housing.
A clean air filter improves engine performance. It also extends the life of your mower.
Summary: By carefully reconnecting the fuel line and replacing the air filter, you ensure your Honda lawn mower’s carburetor functions optimally. Follow these steps to keep your mower in top shape.
Testing The Lawn Mower
After cleaning your Honda lawn mower carburetor, it’s essential to test the lawn mower. This ensures everything is functioning correctly. Below, we’ll go through the steps to start the engine and check its performance.
Start Engine
First, place your lawn mower on a flat surface. Ensure the area is clear of debris. This helps prevent any accidents while testing.
Next, fill the fuel tank with fresh gasoline. Old or dirty fuel can cause problems. Check the oil level and top it up if needed.
Now, engage the choke. This helps in cold starting. Pull the starter rope firmly and quickly. The engine should start within a few pulls.
Once started, let the engine run for a few minutes. This warms up the engine and allows you to observe any issues.
Check Performance
Listen to the engine sound. It should run smoothly without sputtering or knocking. If you hear unusual noises, something might be wrong.
Check the engine speed. It should be consistent and not fluctuate. Irregular speed can indicate a problem with the carburetor.
Observe the exhaust. It should be clear or slightly smoky. Thick black or white smoke can signal an issue.
Finally, test the mower on grass. Ensure it cuts evenly and runs without stalling. If it struggles or stalls, further inspection may be needed.

Frequently Asked Questions
Can You Clean A Lawn Mower Carburetor Without Removing It?
Yes, you can clean a lawn mower carburetor without removing it. Use a carburetor cleaner spray to remove dirt and debris.
Can You Spray Carb Cleaner Directly Into Carb Lawn Mower?
Yes, you can spray carb cleaner directly into the carburetor of a lawn mower. Ensure the engine is off, remove the air filter, and spray the cleaner into the carburetor to remove deposits. Follow the instructions on the cleaner’s label for best results.
How Do I Know If My Lawn Mower Carburetor Is Clogged?
Your lawn mower may have a clogged carburetor if it runs roughly, stalls, or won’t start. Check for fuel flow issues and dirty carburetor parts.
How Do You Clean A Gummed Up Carburetor On A Lawn Mower?
To clean a gummed-up carburetor on a lawn mower, first, remove it from the engine. Disassemble and soak parts in carburetor cleaner. Use a brush to scrub off residue. Rinse with water, dry completely, then reassemble and reinstall. Regular maintenance prevents future clogs.
Conclusion
Cleaning your Honda lawn mower carburetor is straightforward. Follow the steps carefully. Regular maintenance ensures a smooth-running mower. Clean it often to avoid problems. A clean carburetor means better performance. Save time and money by doing it yourself. Remember, safety first.
Always disconnect the spark plug. Use the right tools and be patient. Your lawn mower will thank you. Happy mowing!
