Testing a lawn mower starter is simple. You can do it yourself with basic tools.
A lawn mower that won’t start can be frustrating. Often, the issue lies with the starter. Knowing how to test your lawn mower starter can save you time and money. It helps you figure out if you need a new starter or just a simple fix.
In this guide, you will learn easy steps to test your lawn mower starter. This will help you keep your lawn mower running smoothly. So, let’s get started and get your mower back in action!

Tools Needed
Testing a lawn mower starter requires the right tools. Using the correct tools ensures accurate results and prevents damage. In this section, we will outline the essential tools and safety gear needed for this task.
Essential Tools
Having the right tools is crucial. Here are the must-have tools for testing a lawn mower starter:
- Multimeter: Measures voltage, current, and resistance. Essential for checking electrical components.
- Screwdriver Set: Needed for removing covers and accessing the starter motor.
- Wrenches: Useful for loosening and tightening bolts.
- Battery Charger: Ensures the battery is fully charged before testing.
- Wire Brush: Cleans battery terminals and connections.
Safety Gear
Safety should always come first. Here is the safety gear you will need:
- Safety Glasses: Protects your eyes from debris and sparks.
- Gloves: Keeps your hands safe from sharp edges and electrical shocks.
- Protective Clothing: Wear long sleeves and pants to protect your skin.
Preparing The Lawn Mower
Before testing the lawn mower starter, it is essential to prepare the mower. Proper preparation ensures safety and efficiency. Follow these steps to get your lawn mower ready for testing.
Check The Fuel
Checking the fuel is the first step. Make sure there is enough fuel in the tank. An empty fuel tank can cause the mower to fail to start.
Inspect the fuel for any signs of contamination. Contaminated fuel can clog the system. This can prevent the lawn mower from starting. If the fuel looks dirty, replace it with fresh fuel.
Disconnect The Spark Plug
Next, disconnect the spark plug. This is a crucial safety step. It prevents the mower from accidentally starting while you work.
To disconnect the spark plug, follow these steps:
- Locate the spark plug on the engine.
- Gently pull off the spark plug wire.
- Use a spark plug wrench to remove the spark plug.
Store the spark plug in a safe place. Ensure it is away from any debris. This will keep it clean and ready for reinstallation.
Locating The Starter
Testing a lawn mower starter is essential for ensuring your mower starts smoothly. The first step is locating the starter. This guide will help you identify and access the starter easily. Follow these steps to get started.
Identify The Starter
The starter is a small motor that starts the engine. It is usually located near the engine block. Look for a cylindrical part with wires attached to it. The starter will have a connection to the battery and the ignition system.
Accessing The Starter
Before accessing the starter, ensure the lawn mower is off. Disconnect the spark plug to prevent accidental starts. Remove any covers or shields that may be blocking the starter. Use a wrench or screwdriver to carefully remove these parts.
| Step | Description |
|---|---|
| 1 | Turn off the lawn mower |
| 2 | Disconnect the spark plug |
| 3 | Remove covers or shields |
| 4 | Locate the starter |
Once you have accessed the starter, you are ready to test it. This involves checking the connections and ensuring the starter engages properly. Follow these simple steps to keep your lawn mower in top condition.
Testing The Battery
Testing the battery is a crucial step in diagnosing a lawn mower starter issue. A weak or dead battery can cause the starter to malfunction. This section will guide you through checking the voltage and inspecting connections.
Check Voltage
First, you need a multimeter to check the voltage. Set the multimeter to the DC voltage setting. Connect the red probe to the battery’s positive terminal. Attach the black probe to the negative terminal. A healthy battery should read around 12.6 volts. If the reading is below 12.4 volts, the battery may be weak and need charging.
Inspect Connections
Next, inspect the battery connections. Loose or corroded connections can prevent the starter from working. Look at the battery terminals. They should be clean and tight. If you see any corrosion, clean it with a wire brush. Tighten any loose connections. Ensure the cables are not damaged or frayed. Damaged cables can affect the battery’s performance.
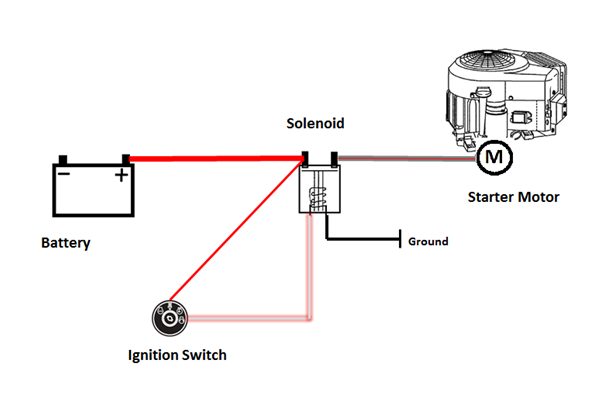
Testing The Solenoid
The solenoid in your lawn mower plays a crucial role. It helps start the engine by connecting the battery to the starter motor. If your lawn mower is not starting, testing the solenoid can help you diagnose the issue. Here’s how you can do it.
Solenoid Function
The solenoid acts as an electrical switch. It transfers power from the battery to the starter motor. When you turn the key, the solenoid engages, allowing current to flow. This action cranks the engine, starting your lawn mower.
Using A Multimeter
To test the solenoid, you need a multimeter. It measures electrical values like voltage, current, and resistance. Follow these steps:
- Turn off the lawn mower and remove the key.
- Locate the solenoid. It is usually near the battery or starter motor.
- Set your multimeter to measure resistance (ohms).
- Connect the multimeter probes to the solenoid terminals.
- Check the reading. A good solenoid will show low resistance.
If the reading is high or infinite, the solenoid may be faulty. Replace it if necessary. This simple test can save you time and frustration.

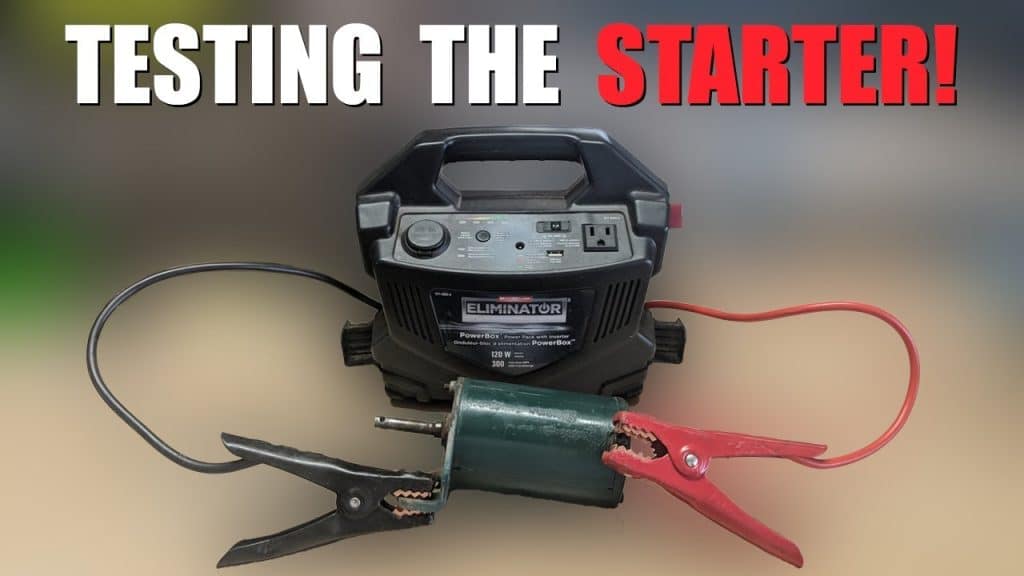
Inspecting The Starter Motor
Inspecting the starter motor is a crucial step in testing your lawn mower starter. A faulty starter motor can prevent your lawn mower from starting. By examining the starter motor, you can identify potential issues and address them promptly. This section will guide you through the process of inspecting the starter motor effectively.
Signs Of Damage
First, check for visible signs of damage on the starter motor. Look for cracks, corrosion, or burnt spots. These can indicate electrical issues or physical wear and tear.
- Inspect the motor housing for cracks.
- Check for rust or corrosion on connectors.
- Look for burnt or discolored areas.
Damaged components often lead to starter motor failure. Replace any visibly damaged parts to ensure optimal performance.
Testing For Continuity
Testing for continuity helps determine if the starter motor circuit is complete. Use a multimeter to perform this test.
- Set the multimeter to the continuity setting.
- Touch the multimeter probes to the motor terminals.
- Check the reading on the multimeter.
A reading of zero or near zero indicates good continuity. A high reading or no reading suggests a broken circuit.
Regular inspection and testing ensure your lawn mower starter motor remains in good condition. This helps maintain your lawn mower’s reliability and performance.
Reassembling The Mower
After testing the lawn mower starter, it’s time to reassemble the mower. Proper reassembly ensures your mower works efficiently. Follow these steps carefully to avoid any issues.
Reconnect The Spark Plug
The spark plug is crucial for the mower’s ignition. Begin by locating the spark plug wire. Ensure it is clean and free of debris.
- First, attach the spark plug wire back to the spark plug.
- Press the wire firmly until you hear a click.
- Check that it is secure and snug.
A loose connection can prevent the mower from starting. Double-check this step to avoid problems.
Final Checks
Before testing the mower, perform some final checks. These steps ensure the mower is safe and ready to use.
- Inspect all parts for proper alignment and connection.
- Ensure the battery is charged and connected.
- Check fuel levels and top up if necessary.
Once everything is in place, try starting the mower. Listen for any unusual sounds. If it starts smoothly, your reassembly is successful.
Regular maintenance and proper reassembly can prolong the life of your lawn mower. Always follow the manual for specific instructions.
Troubleshooting Tips
Testing a lawn mower starter can be tricky. Having a few troubleshooting tips can save time. Let’s dive into some common issues and when to seek professional help.
Common Issues
Several issues can cause a lawn mower starter to fail. Below are some of the most common:
- Battery Problems: A dead or weak battery can prevent the starter from working.
- Loose Connections: Check for loose or corroded connections. They can disrupt the electrical flow.
- Faulty Solenoid: The solenoid may be defective, stopping the starter from engaging.
- Damaged Starter Motor: The starter motor itself might be worn out or damaged.
When To Seek Professional Help
Sometimes, it’s best to call a professional. Here are situations where expert help is needed:
- Persistent Issues: If the starter still doesn’t work after basic checks.
- Complex Electrical Problems: When electrical issues are beyond basic fixes.
- Warranty Concerns: If your mower is under warranty, seek professional service to avoid voiding it.
- Safety Risks: If you’re unsure about safety, it’s better to get professional assistance.
Understanding when to troubleshoot yourself and when to seek help ensures your lawn mower runs smoothly. Keep these tips in mind for efficient and safe maintenance.
Frequently Asked Questions
How Do I Know If My Lawn Mower Starter Is Bad?
To know if your lawn mower starter is bad, check for clicking sounds or no response when turning the key. Test the starter with a multimeter for voltage consistency.
What Tools Are Needed To Test A Lawn Mower Starter?
To test a lawn mower starter, you need a multimeter, screwdriver, and possibly a wrench. These tools help you check connections and voltage.
Can A Lawn Mower Starter Be Repaired?
Yes, a lawn mower starter can often be repaired. Common fixes include replacing the solenoid, cleaning connections, or changing worn-out brushes.
Why Is My Lawn Mower Starter Clicking?
A clicking sound usually indicates a weak battery or poor connection. Check the battery charge and clean any corroded terminals to fix the issue.
Conclusion
Testing your lawn mower starter is simple and essential. Follow these steps to ensure smooth operation. Regular checks can save you time and money. Maintain your mower for long-lasting performance. Clean and inspect the starter regularly. Replace faulty parts to keep it running efficiently.
Happy mowing!
