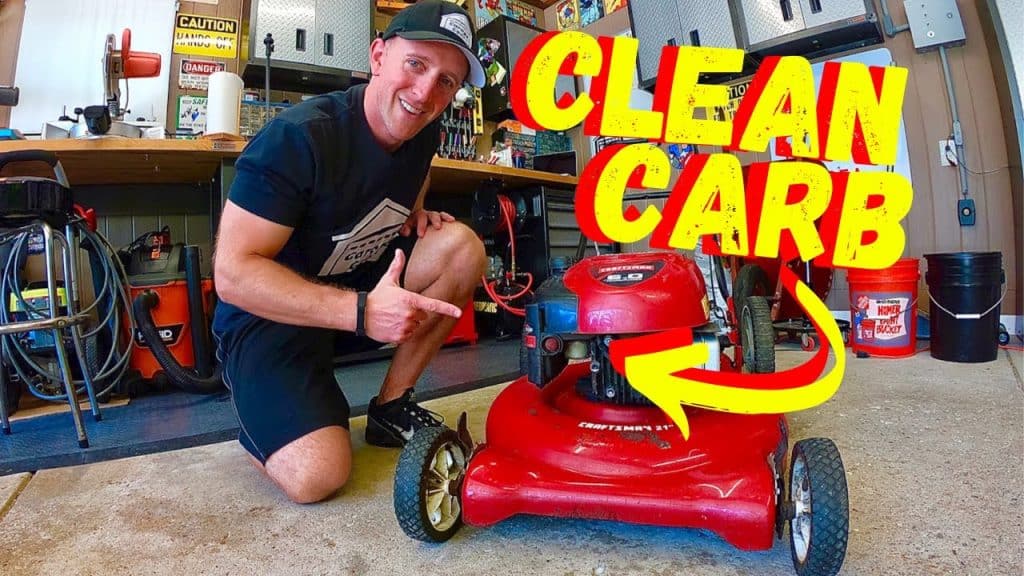
Cleaning a lawn mower carburetor can seem daunting, but it’s essential. A clean carburetor ensures your lawn mower runs smoothly.
Maintaining your lawn mower is key to a healthy lawn. One vital part of this maintenance is keeping the carburetor clean. The carburetor mixes air and fuel, enabling the engine to start and run properly. Dirt and grime can clog this part, causing your mower to stall or not start at all.
Fortunately, cleaning a carburetor is a task you can handle with some basic tools and a bit of patience. In this guide, you’ll learn step-by-step how to clean your lawn mower carburetor, ensuring your mower stays in top condition for all your yard work needs.
Tools And Materials Needed
Cleaning your lawn mower carburetor is a simple task. But, you need the right tools and materials. This ensures the job is done safely and effectively. Below, we’ll break down what you need.
Essential Tools
To start, gather the following tools:
- Screwdrivers: Both flathead and Phillips are necessary.
- Wrench Set: Different sizes help with various bolts.
- Pliers: Useful for gripping and pulling parts.
- Brush: A small, stiff brush is best for cleaning.
- Socket Set: Needed for removing nuts and bolts.
- Flashlight: Helps you see in tight spaces.
Required Materials
Next, have these materials on hand:
- Carburetor Cleaner: A must for dissolving build-up.
- Clean Cloths: For wiping down parts.
- Replacement Gaskets: In case the old ones are damaged.
- Fuel Stabilizer: Keeps your fuel system clean.
- Bucket or Container: To hold small parts during cleaning.
- Gloves: Protect your hands from chemicals and dirt.

Safety Precautions
Before diving into cleaning your lawn mower carburetor, it’s crucial to understand the importance of safety precautions. Ensuring you follow the right safety measures can prevent injuries and keep your equipment in good condition.
Personal Safety Gear
Wearing the correct safety gear is essential. Here’s what you need:
- Safety glasses to protect your eyes from debris.
- Gloves to shield your hands from sharp parts and chemicals.
- Long sleeves and pants to protect your skin from fuel and grime.
Work Area Safety
Setting up a safe work area is just as important. Follow these steps:
- Choose a well-ventilated area. This helps to disperse harmful fumes.
- Keep a fire extinguisher nearby. Fuel can be a fire hazard.
- Clear the area of any flammable materials. This reduces fire risks.
- Ensure good lighting so you can see all parts clearly.
By following these safety precautions, you can clean your lawn mower carburetor safely and effectively.
Preparing The Lawn Mower
Before you clean the carburetor, prepare your lawn mower. Proper preparation ensures safety and efficiency. Follow these steps to get your mower ready.
Disconnecting The Spark Plug
First, disconnect the spark plug. This step prevents accidental starts. Locate the spark plug wire. It is usually on the front or side of the engine. Gently pull the wire off the spark plug. Set the wire aside. This simple action keeps you safe.
Draining The Fuel
Next, drain the fuel. This prevents spills and makes the job cleaner. Find the fuel valve near the carburetor. Turn the valve off to stop fuel flow. Place a clean container under the fuel line. Disconnect the fuel line and let the gas drain into the container. Once drained, reconnect the fuel line. Dispose of the old fuel properly.
Accessing The Carburetor
Cleaning a lawn mower carburetor starts with accessing it. This task may seem daunting, but with clear steps, it’s manageable. You’ll need some basic tools and a bit of patience. Let’s break down the process into simple steps.
Removing The Air Filter
First, locate the air filter. It’s usually on the side of the mower. Remove the cover by unscrewing it. Once the cover is off, take out the air filter. Check the filter for any dirt or debris. Clean it if necessary. This step is crucial as a dirty filter can affect the carburetor’s performance.
Detaching The Carburetor
Next, find the carburetor. It’s typically behind the air filter. Disconnect the fuel line carefully. Be ready with a small container to catch any fuel spills. Now, remove the bolts holding the carburetor in place. Gently pull the carburetor away from the engine. Be cautious not to damage any gaskets or seals. This completes the detachment process.
Cleaning The Carburetor
Cleaning the carburetor is a crucial part of maintaining your lawn mower. A dirty carburetor can cause many issues like poor performance and starting problems. Regular cleaning can extend the life of your mower and ensure it runs smoothly.
Disassembling The Carburetor
First, turn off the lawn mower and disconnect the spark plug. This step ensures safety while working. Next, locate the carburetor, usually near the air filter. Remove the air filter to access the carburetor. Use a screwdriver to detach the carburetor from the engine. Take note of each part and their placement. This will help during reassembly.
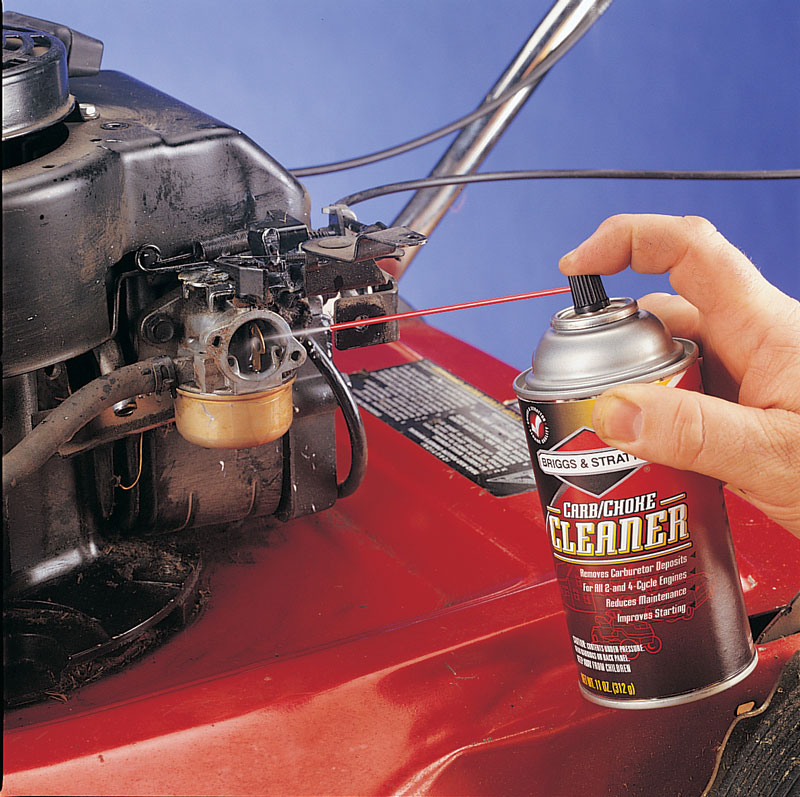
Using Carburetor Cleaner
Once disassembled, clean each part of the carburetor. Use a carburetor cleaner spray. Spray all metal parts thoroughly. Pay special attention to small holes and passageways. Let the cleaner sit for a few minutes. Then, use a brush to scrub away any remaining debris. Rinse with water if necessary and allow to dry completely.
Reassembling The Carburetor
After cleaning your lawn mower carburetor, the next crucial step is reassembling it. This part of the process is vital to ensure your lawn mower runs smoothly. Follow these steps carefully to reattach the parts and check for proper fit.
Reattaching Parts
Start by reattaching the float and the needle valve. These parts control the fuel flow. Ensure the needle valve moves freely. Next, place the float bowl back onto the carburetor body. Tighten the screws evenly to avoid leaks.
Connect the throttle linkage and the choke linkage to their respective positions. These linkages control the engine speed and start-up. Refer to your manual if unsure about their positions.
Checking For Proper Fit
Once all parts are in place, check their fit. Ensure there are no loose screws or misaligned parts. A properly assembled carburetor should feel solid.
Test the movement of the throttle and choke linkages. They should move smoothly without resistance. If they stick, you may need to adjust their alignment.
Lastly, reattach the carburetor to the engine. Ensure the gaskets are in place to prevent air leaks. Tighten the mounting bolts securely.
After reassembly, your lawn mower should start easily and run smoothly. Regular maintenance ensures a long-lasting engine and a well-kept lawn.
Reinstalling The Carburetor
Reinstalling the carburetor is a crucial step in ensuring your lawn mower runs smoothly. Proper reinstallation prevents fuel leaks and ensures efficient operation. Follow these steps to get it right.
Securing The Carburetor
First, align the carburetor with the mounting studs on the engine. Slide it gently into place. Make sure the gasket sits properly between the carburetor and the engine.
Next, use your wrench to tighten the mounting nuts. Secure them evenly to avoid any imbalances. The carburetor should be snug but not overly tight. Check that it’s secure by giving it a slight wiggle. It should not move.
Reconnecting The Air Filter
Reconnect the air filter to the carburetor. Align it correctly with the intake. Make sure the filter is clean before attaching it. A dirty filter can affect engine performance.
Once in place, secure the air filter cover with its screws or clips. Ensure it is tight to avoid any air leaks. A proper seal ensures that clean air reaches the carburetor.
Finally, double-check all connections. Ensure everything is tight and secure. This step is vital for the engine’s efficiency and longevity.
Testing The Lawn Mower
Cleaning a lawn mower carburetor can make a big difference. After cleaning, it is important to test the lawn mower. This ensures the carburetor works well. Here is a step-by-step guide on how to do it.
Refilling The Fuel Tank
First, refill the fuel tank. Use fresh, clean fuel. This helps the engine start easily. Make sure the tank is not overfilled. Leave some space for fuel expansion. Check for any leaks before moving to the next step.
Starting The Engine
Next, start the engine. Pull the starter cord firmly. The engine should start within a few tries. If it does not, check the spark plug. It might need cleaning or replacing. Listen to the engine sound. It should run smoothly without sputtering.

Frequently Asked Questions
What Tools Are Needed To Clean A Carburetor?
You need a screwdriver, wrench, carburetor cleaner, and a small brush. These tools help you disassemble and clean effectively.
How Often Should You Clean A Lawn Mower Carburetor?
Clean your carburetor at least once every season. Regular cleaning ensures optimal performance and prevents engine issues.
What Are The Signs Of A Dirty Carburetor?
Signs include difficulty starting, rough idling, and reduced fuel efficiency. These symptoms indicate it’s time for a thorough cleaning.
Can You Clean A Carburetor Without Removing It?
Yes, but it’s less effective. Removing the carburetor allows for a more thorough and detailed cleaning process.
Conclusion
Cleaning a lawn mower carburetor keeps your mower running smoothly. Regular maintenance saves time and money. Follow the steps carefully for best results. Don’t forget safety precautions. Clean parts with care. Use proper tools and supplies. A clean carburetor improves mower performance.
Enjoy a well-maintained lawn. Happy mowing!
